

Last updated: October 2026
This guide contains affiliate links. As an Amazon Associate, FarmingAround earns from qualifying purchases, at no extra cost to you.
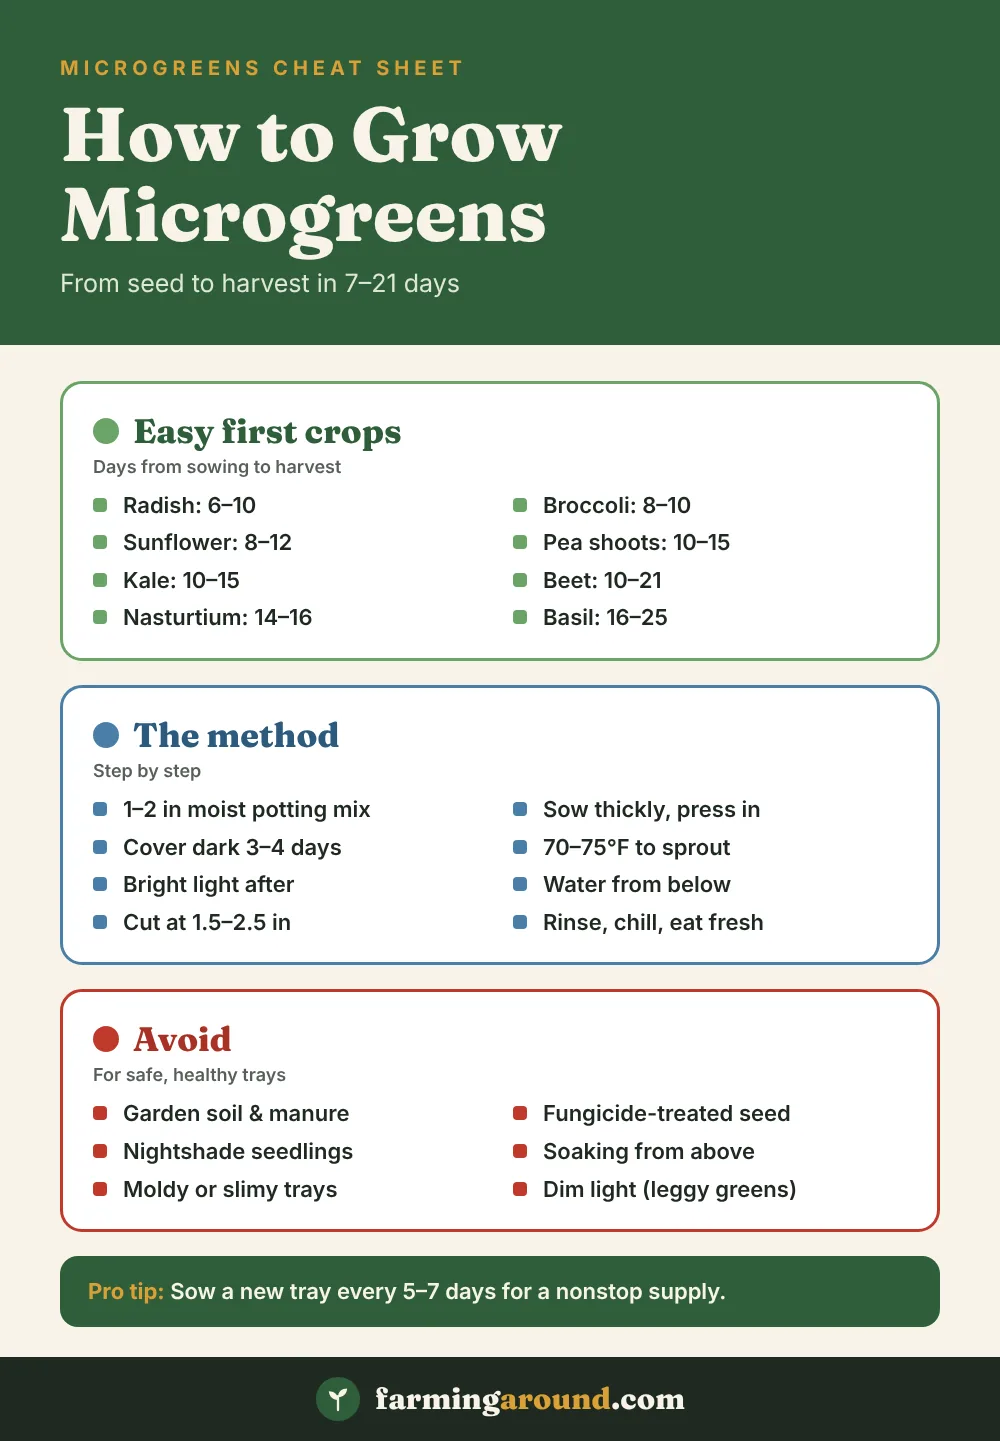
To grow microgreens, sow seeds thickly on 1–2 inches (2.5–5 cm) of moist potting mix in a shallow tray with drainage holes, keep them covered and dark until they sprout, then give them bright light and bottom-water when the mix starts to dry. Most crops are ready in 7 to 21 days, when they’re about 1.5–2.5 inches (4–6 cm) tall and showing their first true leaves. Cut them just above the soil with clean scissors and eat them fresh.
Microgreens are one of the easiest crops you can grow, and you don’t need a garden, a greenhouse or good weather. This guide walks you through the whole process, from choosing seeds and trays to harvesting, storing and growing your next batch, with a timing chart you can save.
Key takeaways
- Fast harvest: radish can be ready in about 6–10 days; most microgreens take 1–3 weeks.
- Use clean potting mix and seed sold for microgreens or sprouting. Skip garden soil, manure and compost.
- Dark first, then bright light: cover seeds until they sprout (usually 3–4 days), then move them under grow lights or to your sunniest window.
- Water from below to keep leaves dry and reduce mold, and cut just above the soil once the first true leaves appear.
In this guide
What Are Microgreens?
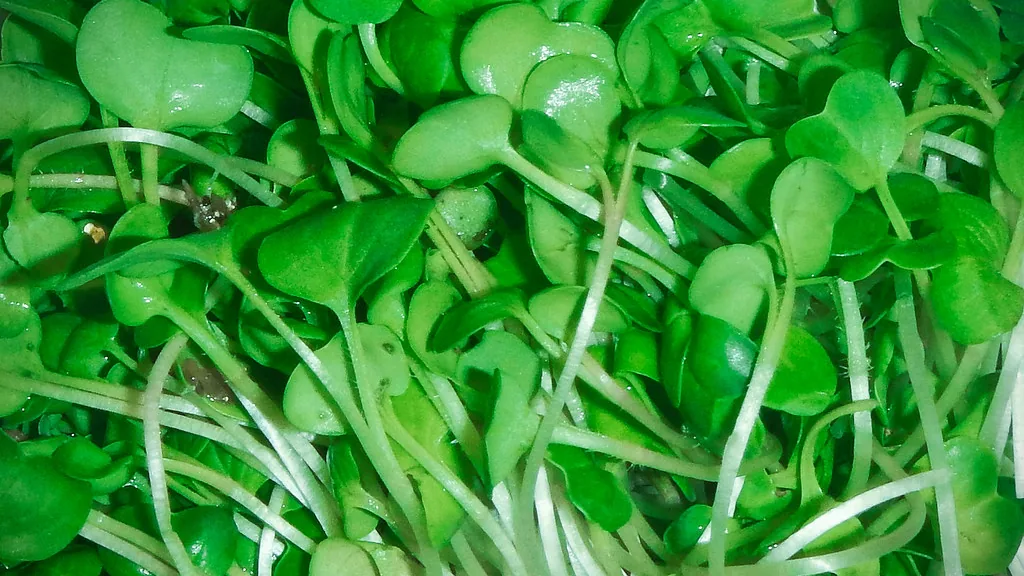
Microgreens are young vegetable and herb seedlings harvested once the seed leaves (cotyledons) have opened and, usually, the first true leaves have started to appear. You eat the stems and leaves and leave the roots behind.
They’re often confused with sprouts, but the two are grown differently:
- Sprouts are germinated seeds grown in water, without soil, and eaten whole (root, seed and shoot) within a few days.
- Microgreens grow in a potting mix or growing mat with light, and only the parts above the soil are harvested.
- Baby greens are left to grow longer, until they have several true leaves, and are usually grown in the garden.
Because microgreens grow in light and are cut above the root zone, they’re a little less risky than sprouts, but basic food hygiene still matters. We cover that in the steps below.
Microgreens Quick Facts
| Topic | What to aim for |
|---|---|
| Time to harvest | 7–21 days for most crops (radish about 6–10 days; basil 16–25 days) |
| Harvest height | About 1.5–2.5 in (4–6 cm), when the first true leaf appears |
| Growing depth | 1–2 in (2.5–5 cm) of moist potting mix or seed-starting mix |
| Germination temperature | About 70–75°F (21–24°C) |
| Blackout period | Covered until seeds sprout, usually 3–4 days |
| Light after sprouting | Grow light a few inches above the tray, or the sunniest window you have |
| Watering | From the bottom, when the mix starts to dry at the edges |
| Fertilizer | Not needed for a single short crop in potting mix |
| Seeding rate (10×20 in tray) | About 2–2.5 tbsp of large seeds or 0.5–1 tbsp of small seeds |
Best Microgreens to Grow
Almost any leafy vegetable or herb whose young leaves are edible can be grown as a microgreen. Start with these reliable, fast crops:
| Crop | Days to harvest | Flavor | Notes |
|---|---|---|---|
| Radish | 6–10 | Peppery | The easiest first crop; very quick and forgiving |
| Broccoli | 8–10 | Mild, cabbage-like | Popular everyday green for salads and sandwiches |
| Sunflower | 8–12 | Nutty, crunchy | Large seed; soak first and press seed hulls off at harvest |
| Pea shoots | 10–15 | Sweet, fresh pea | Large seed; soak first; tall, crisp shoots |
| Kale | 10–15 | Mild, earthy | Easy and productive |
| Beet | 10–21 | Earthy | Hard seed, so soak before sowing; colorful red stems |
| Nasturtium | 14–16 | Spicy | Large seed with a bold flavor |
| Basil | 16–25 | Strong basil | Slower; keep it warm |
Days to harvest vary with temperature, light and how big you like your greens.
Avoid nightshades such as tomato, pepper, eggplant and potato. Their leaves aren’t eaten, so they’re not grown as microgreens. Stick to crops sold as microgreen seed.
When to Grow Microgreens
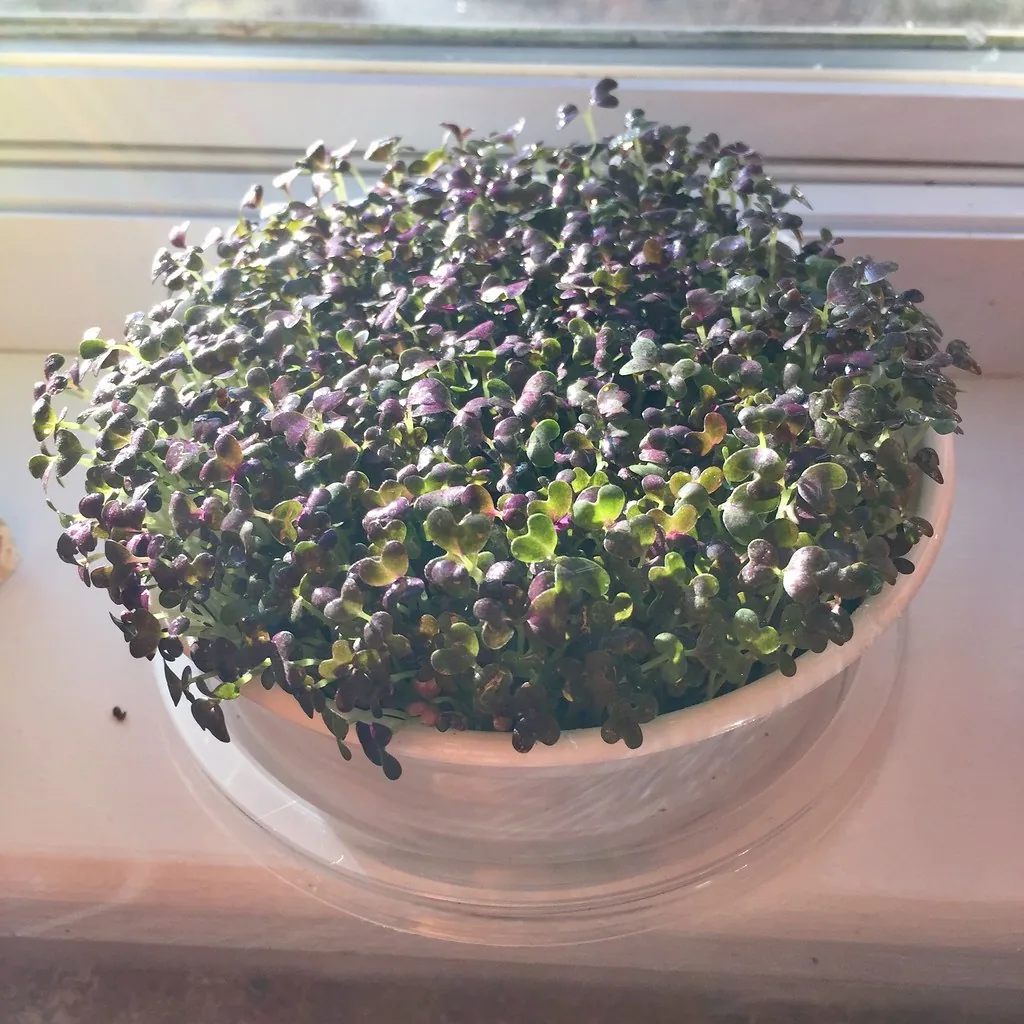
Because they grow indoors in a matter of days, microgreens can be grown all year round in any USDA hardiness zone, with no need to watch your frost dates. They’re especially useful in winter, when outdoor beds are bare. Sow a new tray every week for a steady supply.
You can also grow trays outside on a porch or balcony once nights stay above freezing and daytime temperatures are mild, roughly from your last spring frost to your first fall frost. Keep outdoor trays out of harsh midday sun and heavy rain, and bring them in if a cold snap is forecast.
Southern Hemisphere note: the timing advice is the same, but your sunniest window faces north rather than south. In Australia, New Zealand and South Africa, a bright north-facing windowsill is the best spot if you’re not using grow lights.
What You Need
- A shallow tray with drainage holes. A standard 10×20 inch (25×50 cm) seed tray is ideal, but clean takeaway containers or salad clamshells work for small batches. Wash reused containers with hot, soapy water.
- A second tray without holes to sit underneath for bottom watering.
- Growing medium: fresh, sterile seed-starting mix or a quality potting mix. Some growers use coir or hemp mats. Avoid garden soil, manure and compost, which can carry harmful bacteria.
- Seeds: buy seeds sold for microgreens or sprouting, or marked untreated. Some garden seed is coated with fungicide and isn’t meant to be eaten as a seedling.
- A cover for the blackout stage: a clear lid, another tray, or a damp towel.
- Light: a grow light or LED shop light, or a sunny windowsill.
- A spray bottle and clean scissors.
Prefer a ready-made setup? Our indoor herb garden guide covers lights and windowsill setups that work just as well for microgreens.
How to Grow Microgreens, Step by Step
1. Soak large seeds (optional)
Big, hard seeds such as pea, sunflower and beet germinate faster and more evenly if you soak them in cool water first. A few hours to overnight is typical. Small seeds like radish, broccoli, kale and basil go in dry.
2. Fill the tray
Moisten your mix first so it’s damp but not dripping when squeezed. Fill the tray to 1–2 inches (2.5–5 cm) deep, level it, and press it lightly flat with your hand or another tray.
3. Sow thickly
Scatter seed evenly over the whole surface. Microgreens are sown far more densely than garden crops. As a starting point for a 10×20 inch tray:
- Large seeds (radish, pea, sunflower): about 2–2.5 tablespoons, or roughly 6–8 seeds per square inch.
- Small seeds (broccoli, kale, brassica mixes): about 0.5–1 tablespoon, or roughly 10–12 seeds per square inch.
For smaller containers, scale the amount to the surface area. Press the seed gently into the mix so it makes good contact.
4. Mist and cover (blackout)
Mist the seeds well, then cover the tray to keep it dark and humid. A damp paper towel, a clear lid with a tray on top, or an upturned tray all work. Keep it somewhere warm, ideally around 70–75°F (21–24°C).
Check daily and mist if the surface looks dry. Most seeds sprout within three or four days. Many growers put a light weight on the cover tray during this stage to help roots anchor and stems grow evenly.
5. Uncover and give them light
Once the seedlings are pushing up the cover, remove it and move the tray into bright light. The pale yellow shoots will turn green within a day.
6. Water and grow on
Water from below as described in the next section, rotate the tray each day if it’s on a windowsill, and harvest when the greens reach the size you like.
Pro tip: Start a new tray every 5–7 days. By the time you finish eating one batch, the next is ready, and you never end up with more than you can use.
Watch: Growing Microgreens
This short video from Gardenerd shows a simple method for growing microgreens indoors or outside.
Light, Water and Feeding
Light
Without enough light, microgreens grow tall, pale and floppy as they stretch toward the window. A simple LED shop light or grow light hung a few inches (about 4 in / 10 cm) above the seedlings is the most reliable option. West Virginia University Extension suggests at least six to eight hours a day under bright lights; many growers simply leave lights on for most of the day on a timer.
A bright south-facing window (north-facing in the Southern Hemisphere) also works, especially in spring and summer. Turn the tray daily so the greens grow straight.
Water
Bottom watering is the best method. Pour about an inch of water into the solid tray underneath, let the growing tray soak for a few minutes, then drain off what’s left. This keeps leaves and stems dry, which reduces mold and damping off. Water when the mix starts to dry at the edges or the greens begin to droop, often every day or two.
If you water from the top, use a gentle mist rather than a jug. Never let trays sit in standing water for long.
Feeding
Microgreens live mostly on the energy stored in the seed, so a single crop grown in a potting mix doesn’t need fertilizer. Growers using bare mats sometimes add a diluted hydroponic nutrient for slower crops, but it isn’t necessary for a home tray.
When you’re done, the spent mix and roots can go straight on the compost heap. See our guide on how to build a compost pile.
Mold and Other Problems
| Problem | Likely cause | Fix |
|---|---|---|
| Gray or cottony mold on the soil or stems | Too wet, too warm, poor airflow, seed sown too thickly | Water from below, add a small fan, sow a little thinner; if mold keeps spreading, compost the tray and start again |
| Fuzzy white hairs along the roots | Normal root hairs (common on radish and brassicas) | Nothing; root hairs are even and clean, while mold is patchy, slimy or smells bad |
| Tall, pale, floppy greens | Not enough light | Move lights closer or use a brighter window |
| Seedlings collapse at the base | Damping off from overwatering or reused, unclean mix | Use fresh mix, clean trays and bottom watering |
| Patchy germination | Old seed, uneven sowing, mix too dry, or cover removed too early | Use fresh seed, sow evenly and keep the cover on until most seeds sprout |
| Seed hulls stuck to leaves | Normal for sunflower and some other large seeds | Brush off by hand or rinse at harvest |
Don’t eat moldy or slimy greens. If a tray smells bad, looks slimy or has spreading mold, throw it out rather than trying to cut around it. Clean the tray well before reusing it.
How to Harvest Microgreens
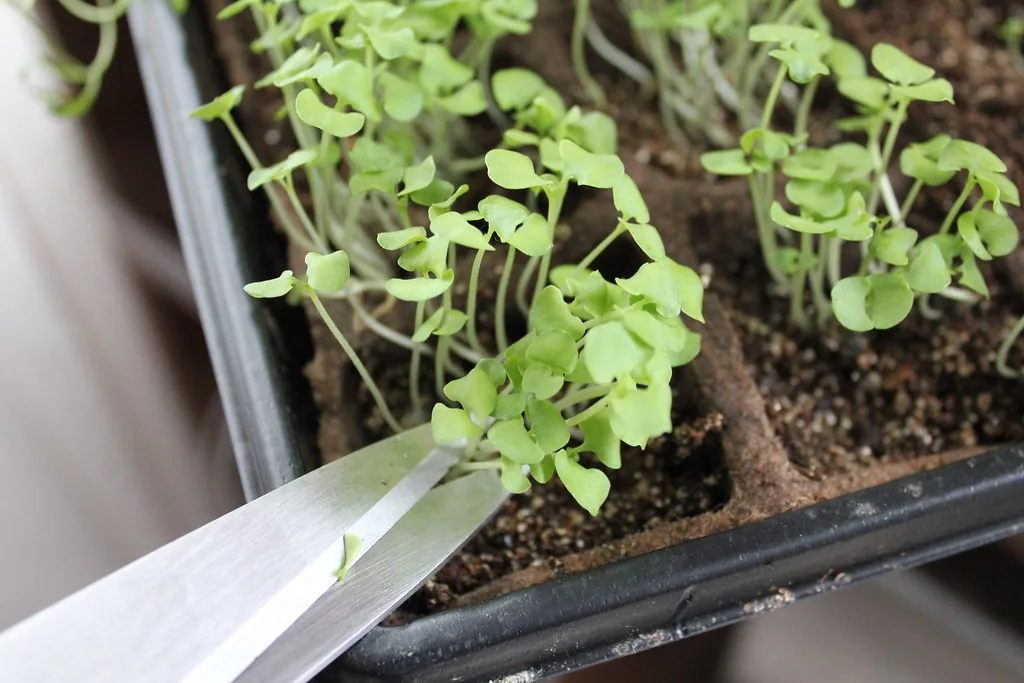
Harvest once the seed leaves are fully open and the first true leaves are just appearing, usually at 1.5–2.5 inches (4–6 cm) tall. Earlier harvests are more tender; later ones have more flavor but can turn stringy or bitter.
- Water the day before, not right before you cut, so the leaves are dry.
- Use clean, sharp scissors or a knife.
- Hold a handful of greens and cut about ¼–½ inch (0.5–1 cm) above the soil line.
- Cut only what you need and leave the rest growing for a few more days.
- Rinse in cool water just before eating, and pick out any seed hulls.
Most microgreens don’t regrow after cutting. Pea shoots are the exception; they sometimes give a second, smaller cut if you leave a leaf node behind. Otherwise, compost the mat or mix and sow a fresh tray.
Storing Microgreens
- Store unwashed, dry microgreens in a clean container or bag lined with a paper towel.
- Refrigerate straight away and wash them only just before eating.
- Eat them as soon as possible. They keep their best texture for a few days; hardier greens like pea and sunflower last longer than delicate basil.
- Throw out any that turn slimy, smell off or show mold.
Use them on sandwiches, salads, soups, eggs, tacos and grain bowls. Add them at the end of cooking so they stay crisp. If you also grow full-size crops, our guide on how to store vegetables covers the rest of your harvest.
Microgreens at a Glance
Ready to move outdoors as well? Pair indoor trays with a seasonal plan from our vegetable planting calendar, or start a small plot with our guide on how to start a vegetable garden.
Helpful gear for this guide
Handy picks that match the advice above.
Links go to Amazon. Prices and availability change, so check reviews and fit for your setup before buying.
FAQ
How long do microgreens take to grow?
Most take 7–21 days from sowing to harvest. Radish is one of the quickest at about 6–10 days, broccoli and sunflower take around 8–12 days, and basil is slower at roughly 16–25 days.
Do microgreens need sunlight?
They need light, but it doesn’t have to be sunlight. A simple LED grow light a few inches above the tray works better than most windowsills. Seeds sprout in the dark, but after that, low light gives tall, pale, weak greens.
Can I grow microgreens without soil?
Yes. Coir, hemp and other growing mats work well, especially for small seeds. Soil-free mats are cleaner, but they dry out faster, so check moisture daily.
Do microgreens grow back after cutting?
Most don’t, because cutting removes the growing point. Pea shoots can sometimes regrow if you leave a leaf node, but the second cut is smaller. It’s usually best to compost the tray and resow.
Can I use regular garden seeds for microgreens?
Only if they’re untreated. Some garden seed is coated with fungicide, which you don’t want to eat. Seed sold for microgreens or sprouting is untreated and is usually cheaper in the larger amounts you’ll need.
Why are my microgreens falling over?
Usually not enough light, so the stems stretch and flop. Too much water or overcrowding can also cause collapse. Move the lights closer, water from below and sow a little less densely next time.
Sources
- Growing Microgreens (University of Illinois Extension)
- Grow This! Microgreens (West Virginia University Extension)
- Growing Microgreens (Cornell Cooperative Extension)

One Comment