

Last updated: October 2026
This guide contains affiliate links. As an Amazon Associate, FarmingAround earns from qualifying purchases, at no extra cost to you.
Prune most fruit trees in late winter or early spring, while they’re dormant and before the buds break. Start by removing dead, damaged and diseased wood, then crossing and inward-growing branches, water sprouts and suckers, and finally thin the canopy so light reaches the middle of the tree. Cut just outside the branch collar, and take off no more than about a quarter of the live growth in one year.
That’s the short version. Below you’ll find when to prune each type of fruit tree, the tools you need, the two basic cuts, how to shape young and mature trees, and the mistakes that cost you fruit.
Key takeaways
- Timing: late winter to early spring for apples, pears and peaches; summer for established plums and cherries in damp climates.
- Order of work: dead, damaged and diseased wood first, then crossing branches, water sprouts and suckers, then thinning.
- Cut at the branch collar, never flush with the trunk, and skip the wound paint.
- Little and often: remove no more than about 25% of live growth per year.
In this guide
Why Prune Fruit Trees?
An unpruned fruit tree keeps growing, gets shaded in the middle and gradually produces smaller fruit, higher up, in alternate years. Regular pruning:
- lets sunlight and air into the canopy, which improves fruit size, color and quality and helps leaves dry faster after rain;
- builds a strong framework of well-spaced branches that can carry a heavy crop without splitting;
- removes dead and diseased wood before problems spread;
- keeps the tree at a height you can pick and spray from the ground.
Pruning does slightly dwarf a tree and can reduce the total number of fruits, but the fruit you do get is bigger and better.
When to Prune Fruit Trees
For most fruit trees, the best time is the late dormant season, after the coldest weather has passed but before the buds open. Cuts heal quickly once growth starts, you can see the branch structure clearly without leaves, and you avoid cold damage to fresh cuts that can happen with early-winter pruning.
| Fruit tree | Main pruning time | Notes |
|---|---|---|
| Apple and pear | Late winter, before bud break | Avoid spring and summer cuts where fire blight is common |
| Peach and nectarine | Late winter to early spring, as buds begin to swell | Fruit forms on last year’s shoots, so prune every year |
| Plum | Early spring (young trees); summer (established trees) | The RHS advises against winter and autumn pruning because of silver leaf and bacterial canker |
| Cherry and apricot | Summer, in dry weather, in damp climates | Also prone to silver leaf and canker; in dry climates, late-winter pruning is also common |
| Fig | Late winter to early spring | Light shaping is usually enough; heavy cuts remove the early (breba) crop |
By zone: the month changes with your climate. In colder areas (roughly USDA zones 3–5) the dormant window usually falls in late winter to early spring, after the worst cold. In milder areas (zones 8–10) trees may break bud as early as late winter, so prune earlier. Use your last frost date as a guide and finish before the buds open.
Southern Hemisphere note: the seasons are reversed. Dormant pruning usually falls in winter (around June to August in Australia, New Zealand and South Africa), and summer pruning of stone fruit happens around December to February.
Summer pruning is useful too. Light cuts after the main growth flush slow down vigorous trees, let light reach ripening fruit and remove water sprouts. Keep summer cuts small.
Tools You Need
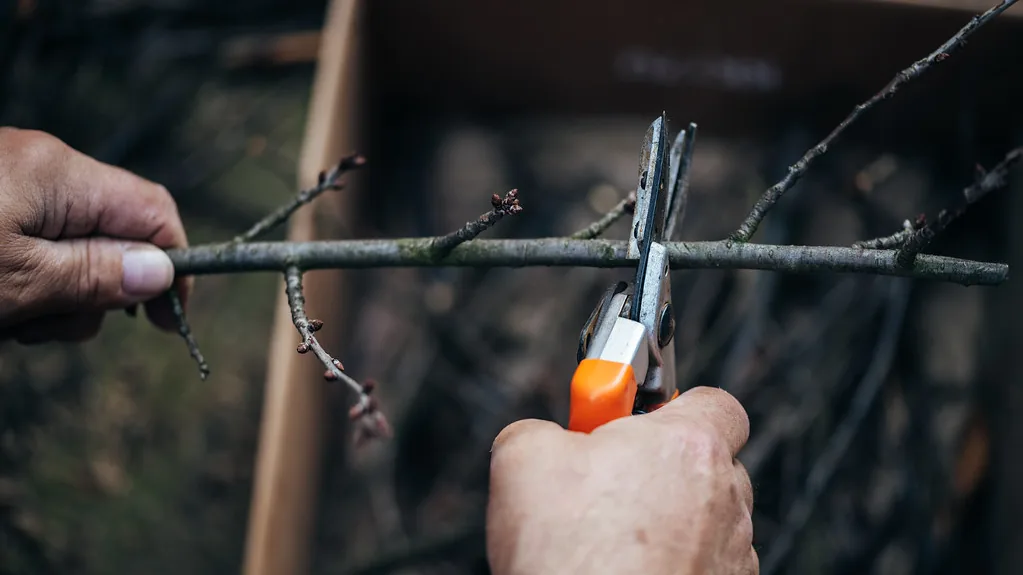
- Bypass hand pruners (secateurs) for shoots up to about ½–¾ inch (1–2 cm) thick.
- Loppers for branches up to about 1½ inches (4 cm).
- A pruning saw for anything thicker.
- A sturdy orchard ladder or pole pruner for taller trees.
- Gloves and eye protection.
- Rubbing alcohol or a disinfectant to clean blades between trees, especially after cutting out diseased wood.
Sharp, clean blades make smooth cuts that seal faster. Bypass tools cut like scissors; anvil pruners can crush live stems.
The Two Basic Pruning Cuts
Thinning cuts
A thinning cut removes a whole branch back to its point of origin, at the trunk or a larger limb. It opens up the canopy without causing a flush of new shoots, so it’s the cut you’ll use most on mature trees.
Heading cuts
A heading cut shortens a shoot back to a bud. It stimulates several new shoots below the cut and is used mainly on young trees to encourage branching, or to shorten long, whippy limbs. Cut about ¼ inch (6 mm) above an outward-facing bud, sloping away from it.
Cutting at the branch collar
Every branch has a slightly swollen ring of tissue where it joins the trunk or a larger limb, called the branch collar. Cut just outside it, without leaving a stub. A flush cut damages the collar and lets decay into the trunk; a long stub dies back and rots.
For branches too heavy to hold, use the three-cut method: an undercut about 18 inches (45 cm) out from the trunk, a top cut a little farther out so the branch drops cleanly, then a final cut just outside the collar to remove the stub.
Pro tip: Skip the wound paint. Extension specialists agree that pruning sealant isn’t normally needed; a clean cut at the collar seals itself.
How to Prune a Fruit Tree, Step by Step
- Step back and look. Walk around the tree and decide on the shape you want before making a single cut.
- Remove the three Ds: dead, damaged and diseased wood. Cut back into healthy wood, and clean your blades afterwards.
- Take out suckers and water sprouts. Suckers grow from the rootstock at the base; water sprouts are vigorous vertical shoots on branches. Neither will fruit well.
- Remove crossing and rubbing branches, and those growing back into the center of the tree or straight down.
- Thin crowded areas so branches are evenly spaced and light can reach every part of the canopy. Keep branches with wide angles to the trunk; narrow, V-shaped crotches are weak.
- Control height by cutting tall upright limbs back to a lower outward-facing branch.
- Stop at about a quarter. Removing more than roughly 25% of the live canopy in one season triggers a flush of water sprouts. Spread big renovations over two or three winters.
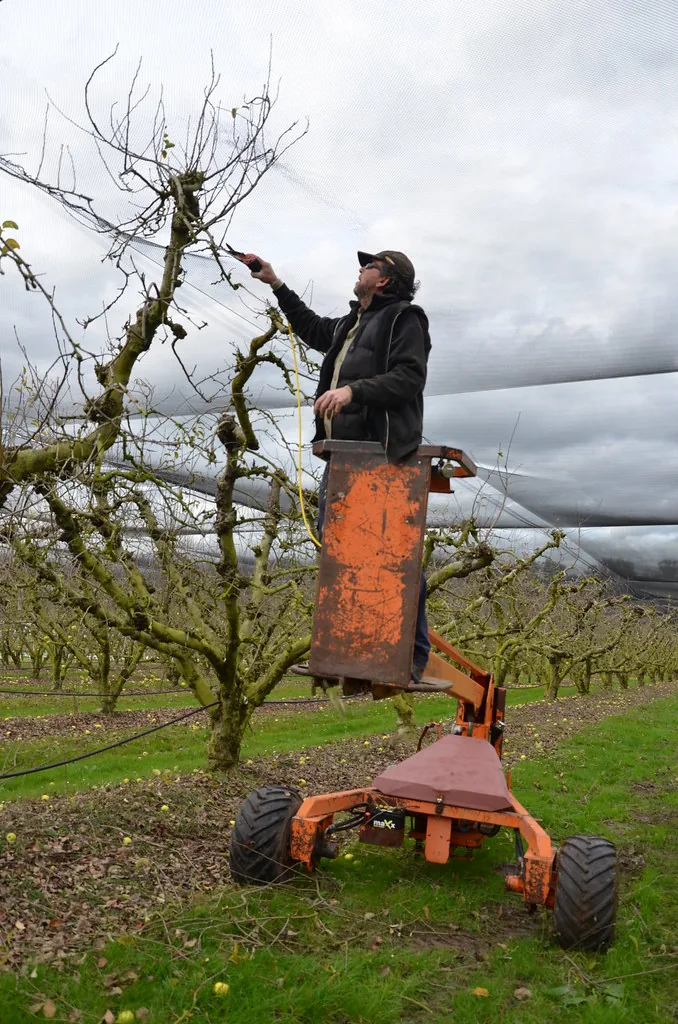
Safety first: never prune near power lines, and call an arborist for large limbs high in the tree. Most falls happen from ladders on soft or uneven ground.
Watch: Winter Pruning for Fruit Trees
Gardenerd walks through winter pruning of dormant fruit trees in this step-by-step video.
Training Young Trees
The first three years of pruning decide the tree’s shape for life. There are two main systems.
Central leader (apples, pears and many plums and cherries)
- Keep one dominant central trunk (the leader).
- Choose 2–4 main scaffold branches per tier, spaced at least 6 inches (15 cm) apart up the trunk, with the lowest about 18–24 inches (45–60 cm) above the ground.
- Aim for wide crotch angles of roughly 60–80 degrees. Spread young branches with clothespins or wooden spreaders while they’re still flexible.
- Keep the tree cone-shaped, wider at the bottom than the top, so lower branches aren’t shaded.
Open center or vase (peaches and nectarines)
- Remove the central leader and keep 3–5 evenly spaced scaffold branches growing outward, like the ribs of a bowl.
- Keep the center open to sunlight.
- On mature peach trees, keep a good supply of 12–18 inch (30–45 cm) shoots from last season, since that’s where next year’s fruit forms.
Choosing new trees? Our list of fast-growing fruit trees notes which ones crop soonest and suit small gardens.
Common Pruning Mistakes
- Topping the tree: chopping all the branches back to a flat height causes dozens of weak, upright water sprouts.
- Pruning too hard in one year: keep it to about a quarter of the canopy.
- Flush cuts and stubs: cut just outside the branch collar.
- Wrong timing for stone fruit: in wet climates, winter cuts on plums and cherries invite silver leaf and canker.
- Removing all the fruiting wood: learn where your tree fruits (spurs on apples and pears, one-year shoots on peaches) and keep plenty.
- Dull or dirty tools: ragged cuts heal slowly and dirty blades spread disease.
Pruning at a Glance
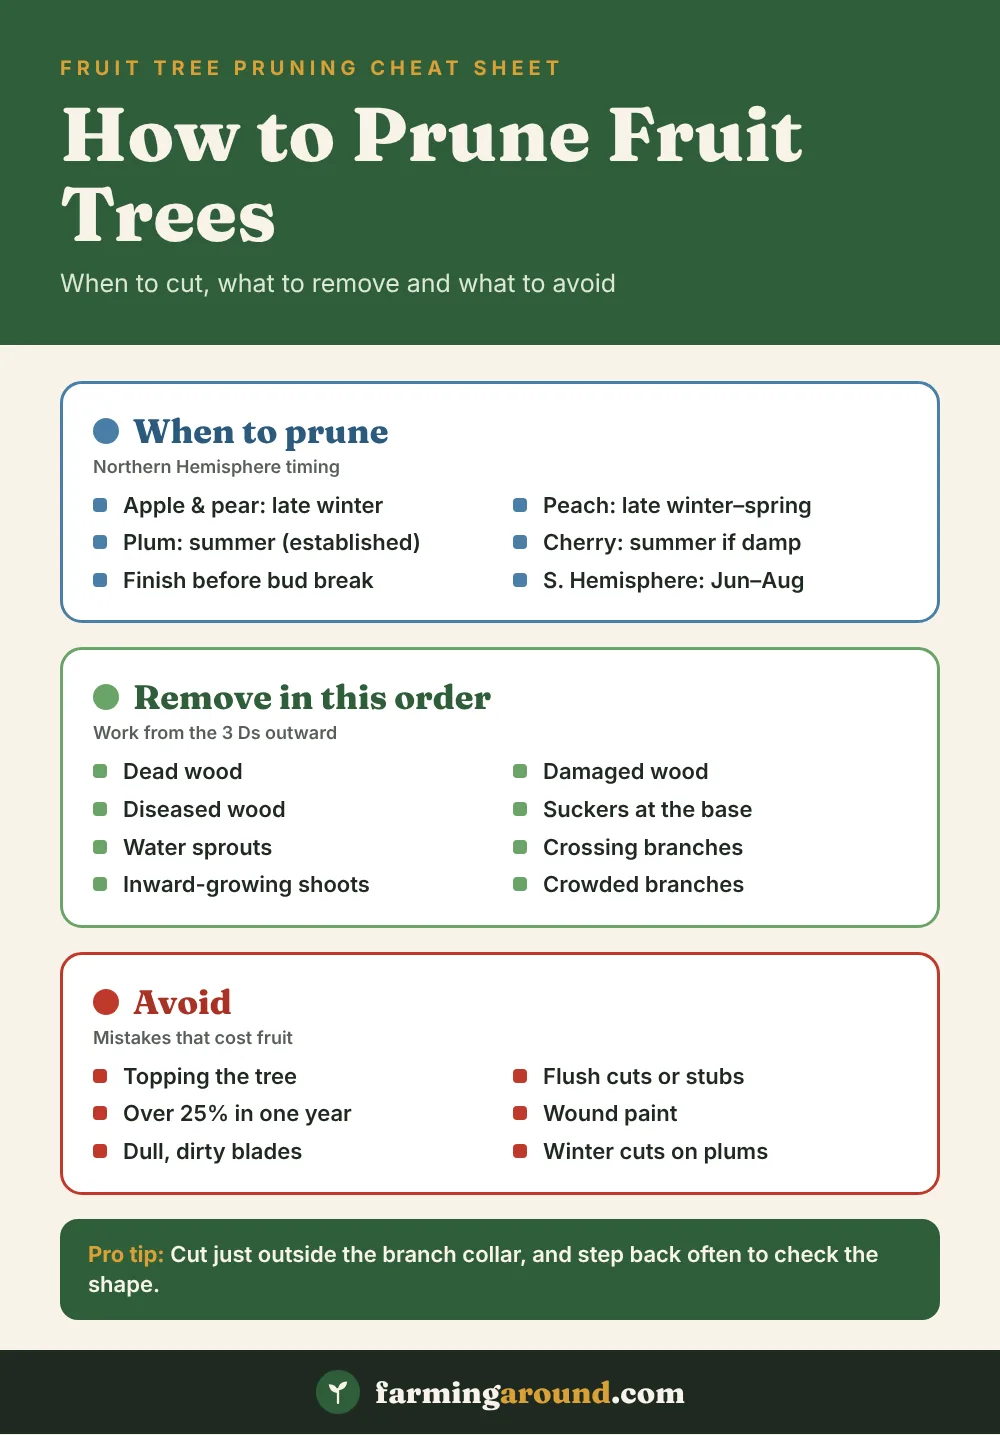
Prunings make good material for a compost heap or brush pile once they’re chopped small; see how to build a compost pile. Leave diseased wood out and dispose of it separately.
Helpful gear for this guide
Handy picks that match the advice above.
Links go to Amazon. Prices and availability change, so check reviews and fit for your setup before buying.
FAQ
What month should you prune fruit trees?
In the Northern Hemisphere, most fruit trees are pruned in late winter to early spring, typically between about January and March depending on your zone. Finish before the buds open. In the Southern Hemisphere, that’s roughly June to August.
Can you prune fruit trees in summer?
Yes, lightly. Summer pruning slows vigorous growth, lets light reach the fruit and is the preferred time for established plums and cherries in damp climates. Avoid heavy summer cuts on apples and pears where fire blight is a problem.
How much can you cut off a fruit tree?
As a rule of thumb, no more than about a quarter of the live canopy in one year. Neglected trees should be brought back over two or three winters.
Should I seal pruning cuts?
No. Wound dressings and pruning paint aren’t normally needed and can trap moisture. A clean cut made just outside the branch collar seals naturally.
Can you prune a fruit tree too late?
Pruning after the buds have opened and the tree is in full growth isn’t fatal, but it wastes the tree’s energy, can remove flowers and fruit, and may increase disease risk. If you miss the window, do only the essential cuts and wait until next winter for the rest.


One Comment