

Last updated: September 2026
This guide contains affiliate links. As an Amazon Associate, FarmingAround earns from qualifying purchases, at no extra cost to you.
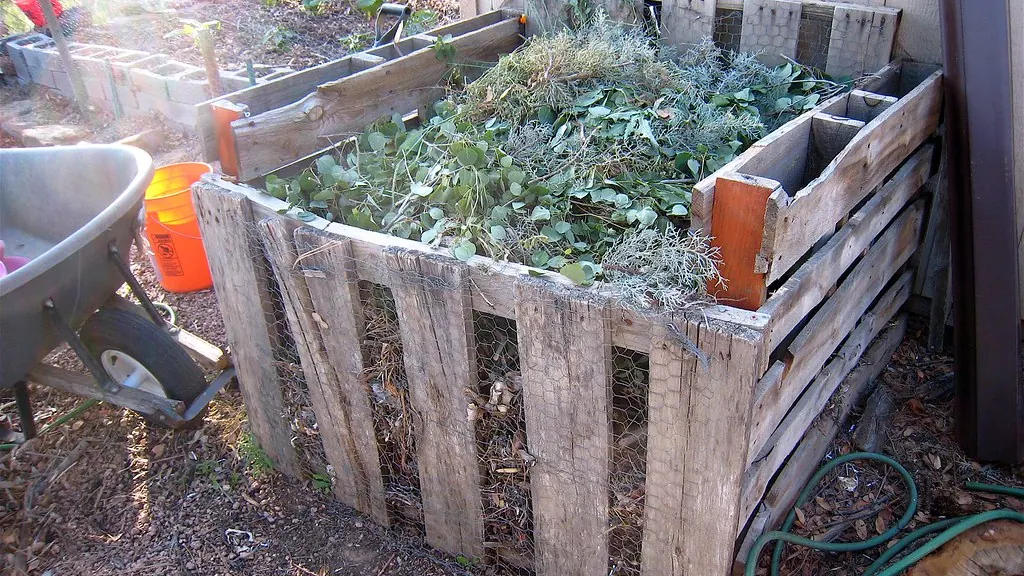
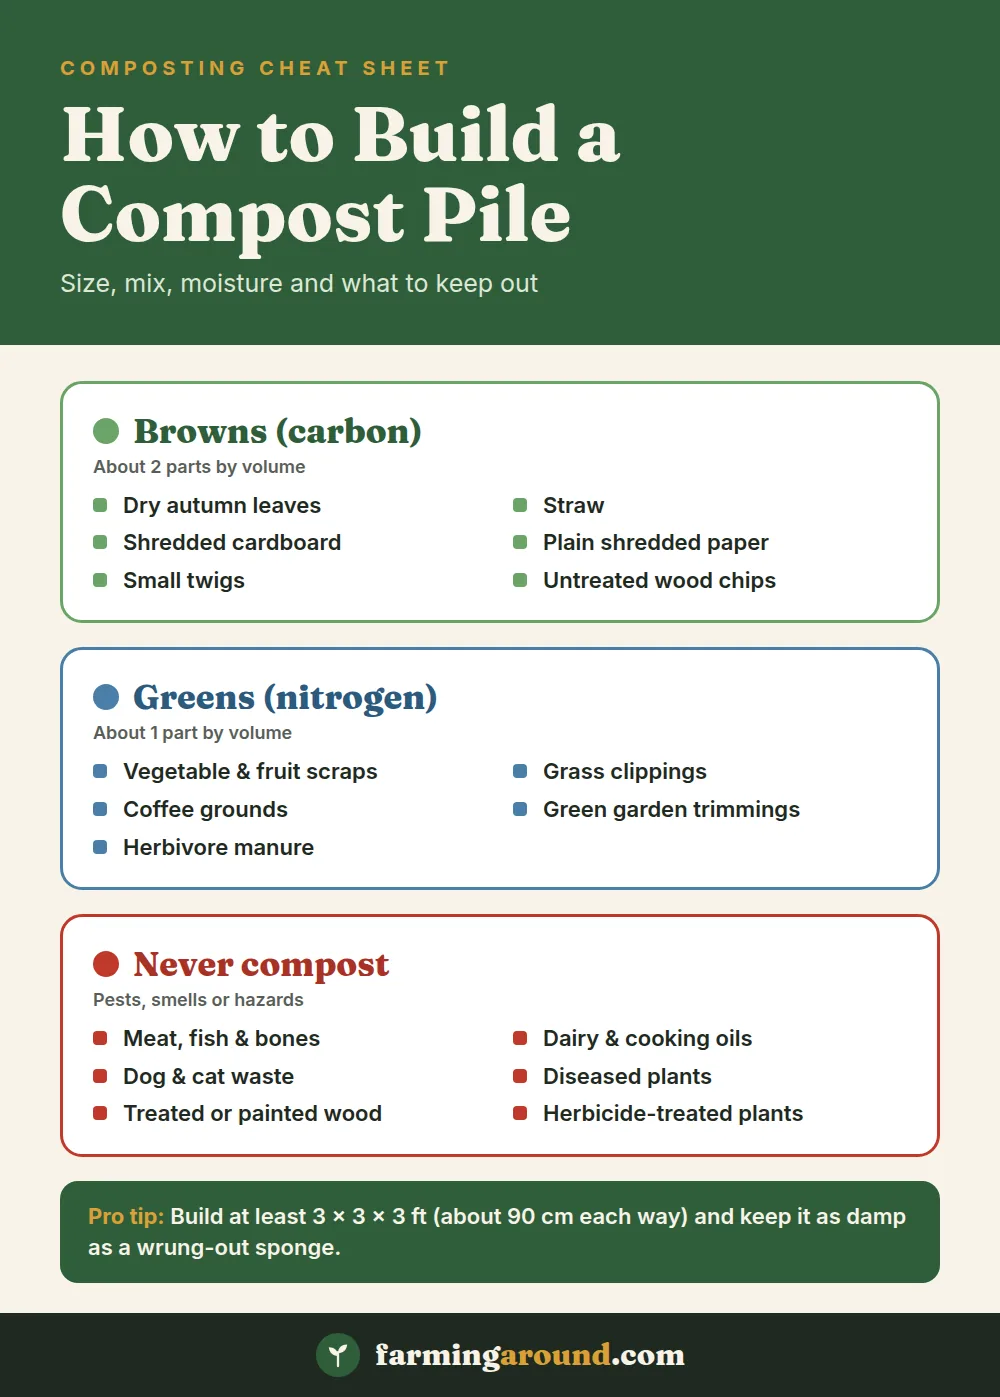
Here is how to build a compost pile: pick a level, well-drained spot, lay down a few inches of coarse brown material, then add roughly two parts browns (dry leaves, straw, shredded cardboard) to one part greens (kitchen scraps, grass clippings), watering as you go until the whole heap feels like a wrung-out sponge. Build it to at least 3 × 3 × 3 ft (about 90 × 90 × 90 cm) if you want it to heat up. Then turn it every week or so. A well-managed hot pile can give you usable compost in a few months, and a pile you leave alone will still get there in about a year.
That is the whole method. The rest of this guide covers the details that decide whether your heap turns into dark, crumbly compost or a soggy, smelly mess: getting the greens and browns balanced, choosing between an open heap, a compost bin or a tumbler, hot versus cold composting, what to keep out, and how to fix the most common problems.
Key takeaways
- Size matters for heat: about 3 × 3 × 3 ft (27 cubic feet, roughly 1 cubic yard) is the usual minimum for hot composting. Keep it under about 5 ft (1.5 m) tall so it doesn’t compact.
- Mix about 2 parts browns to 1 part greens by volume. That gets you close to the carbon to nitrogen ratio of about 30:1 that microbes work best at.
- Keep it damp, not wet: the “wrung-out sponge” test (roughly 40–60% moisture) is the single most useful check you can do.
- Leave out meat, dairy, oils, pet waste, diseased plants and treated wood. They attract pests, smell, or carry things you don’t want in your garden.
In this guide
- What You Need
- Choosing a Site and Size
- Greens and Browns: Getting the Mix Right
- How to Build a Compost Pile Step by Step
- Compost Pile and Bin Design Options
- Hot vs Cold Composting
- Maintaining Your Pile: Moisture, Turning and Temperature
- What NOT to Compost
- Troubleshooting Common Compost Problems
- When Compost Is Ready and How to Use It
- Timing for Cold Climates and the Southern Hemisphere
- Quick Reference: Compost Pile Basics
- FAQ
- Sources
What You Need
You don’t need to buy much. A basic compost pile can be built from things most gardens already produce.
- Brown (carbon-rich) materials: dry leaves, straw, shredded non-glossy paper and plain cardboard, small twigs, untreated wood chips.
- Green (nitrogen-rich) materials: fruit and vegetable scraps, fresh grass clippings, coffee grounds, green garden trimmings, and manure from plant-eating animals such as chickens, rabbits, horses or cows.
- Water: a hose or watering can within reach.
- A garden fork or compost aerator for turning.
- Optional structure: wire mesh, four wooden pallets, or a ready-made compost bin or tumbler (see the design options below).
- Optional compost thermometer: a long-stemmed one lets you check whether a hot pile is actually heating.
- A covered kitchen caddy to collect scraps between trips outside.
Before you learn how to build a compost pile, stockpile browns in autumn. Bagged leaves store easily and balance summer grass clippings and kitchen scraps all year.
Choosing a Site and Size
A good spot makes the pile easier to look after and less likely to annoy neighbors.
- Level, well-drained ground. Build directly on soil rather than concrete or paving if you can, so excess water drains away and soil organisms can move in.
- Convenient but not in the way. Close enough to the kitchen and garden that you’ll actually use it, with room to turn the pile and get a wheelbarrow in.
- Near a water source. Piles dry out quickly in hot weather.
- Partial shade is fine. In hot climates it helps stop the pile drying out; in cool climates a sunnier spot can help it stay warm.
- Away from property lines, wells and streams. Check any local rules on where compost piles can go.
Size: University extension services, including NC State and the University of Maryland, give 3 × 3 × 3 ft (27 cubic feet) as the minimum size for a pile that can hold heat. That’s about 1 cubic yard, or roughly 0.75 m³. The UK’s Royal Horticultural Society (RHS) notes that bins smaller than about 1 m³ tend to be less efficient, although they will still make compost. On the other end, the University of Maryland advises keeping piles no more than about 5 ft (1.5 m) tall, because bigger heaps compact and starve the middle of air.
Greens and Browns: Getting the Mix Right
Composting microbes need carbon for energy and nitrogen to grow. Cornell University’s composting program puts the ideal carbon to nitrogen ratio at around 30:1 by weight. You don’t need to calculate it. A practical rule from NC State Extension is roughly 2 parts browns to 1 part greens by volume. The RHS suggests greens should make up about 25–50% of the heap.
| Material | Type | Typical C:N ratio | Notes |
|---|---|---|---|
| Autumn leaves | Brown | 30–80:1 | Shred them or they mat into layers |
| Straw | Brown | 40–100:1 | Keeps the pile open and airy |
| Sawdust (untreated) | Brown | 100–500:1 | Very high carbon; use sparingly and mix well |
| Shredded paper / cardboard | Brown | High carbon | Plain, non-glossy, no tape or wax coating |
| Grass clippings | Green | 15–25:1 | Mix in thin layers; thick layers go slimy |
| Vegetable scraps | Green | 15–20:1 | Chop large pieces; bury in the center |
| Manure (plant-eating animals) | Green | 5–25:1 | Adds nitrogen fast; never dog or cat waste |
| Coffee grounds | Green | Nitrogen-rich | Paper filters can go in too |
C:N ranges from Cornell Composting. Values vary a lot with the exact material and how fresh it is.
Too many greens and the pile gets wet, dense and smells of ammonia. Too many browns and it just sits there cold. When in doubt, add more browns. It is the most common fix.
How to Build a Compost Pile Step by Step
This method builds a hot pile all at once, which is the fastest route. If you’re adding scraps a bit at a time, follow the same order and top it up as material comes in.
- Gather enough material first. For a hot pile, you need enough to fill about a cubic yard in one go. Pile up browns and greens separately beside the site.
- Chop or shred large pieces. Smaller pieces break down faster. Run leaves over with a mower and snap or cut stems and twigs.
- Loosen the soil and lay a base. Fork over the ground, then add a 4–6 in (10–15 cm) layer of coarse browns such as twiggy stems or straw. This helps air and drainage at the bottom.
- Add alternating layers. Add a layer of greens a few inches deep, then roughly twice that depth of browns. Put kitchen scraps in the middle of the pile rather than at the edges.
- Water each layer as you go. Aim for a wrung-out-sponge feel all the way through. Wetting dry leaves as you build is much easier than soaking a finished pile.
- Mix the layers. Layers are a good way to measure, but microbes work best when greens and browns touch. Fork through the pile once it’s built, or mix as you go.
- Finish with browns. A top layer of browns covers food scraps, cuts down on flies and smells, and helps keep animals out.
- Cover in very wet climates. A tarp or lid keeps winter rain from waterlogging the heap. The RHS recommends covering compost to protect it against rain.
- Check the temperature after a few days. The University of Maryland notes that a well-built hot pile should start warming within about 24 hours of filling.
Watch: How to Compost
This short video from the Royal Horticultural Society walks through home composting basics.
Compost Pile and Bin Design Options
You can compost in a free-standing heap or in a compost bin. A container keeps the pile neat, holds its shape and makes it easier to manage in a small yard. Here’s how the common designs compare.
| Design | Relative cost | Pros | Cons | Best for |
|---|---|---|---|---|
| Open heap | Free | No building; easy to turn; any size you like | Looks untidy; dries out or gets soaked more easily; less pest-resistant | Large gardens, farms, lots of leaves |
| Wire mesh bin (hoop of hardware cloth or fencing) | Low | Quick to set up; good airflow; lift the hoop off to turn | Dries out at the edges; not rodent-proof unless fine mesh is used | Leaves and garden waste; beginners |
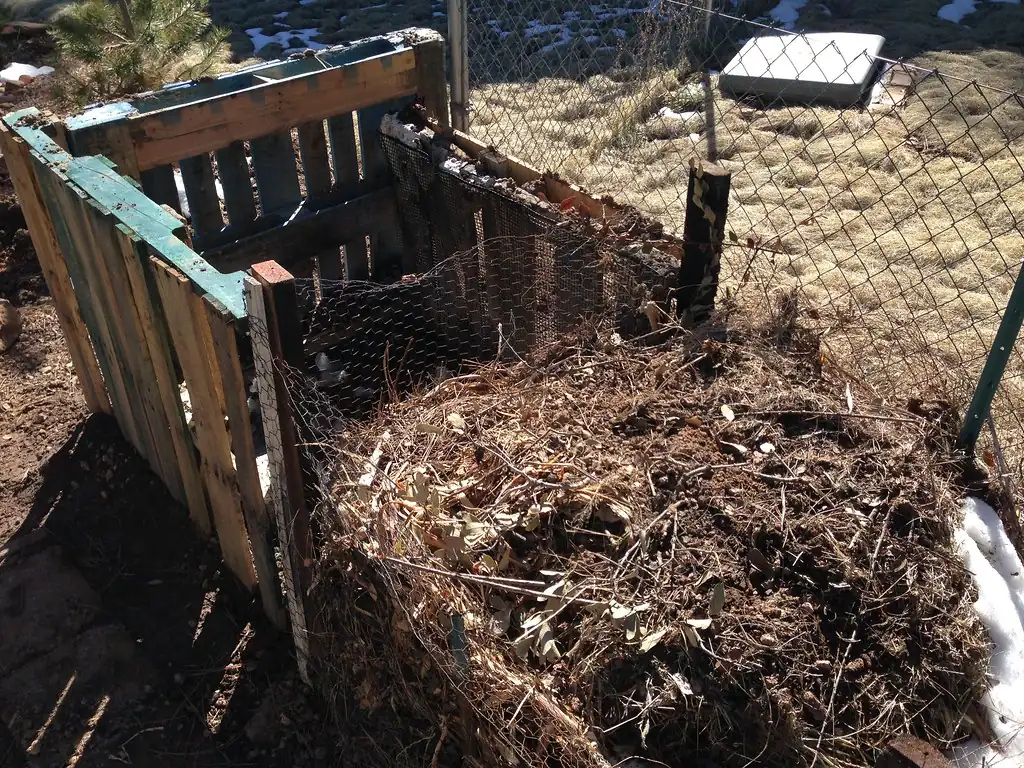
| Pallet bin (4 pallets tied together) | Low (often free pallets) | Sturdy; holds about a cubic yard; airflow through the slats | Pallets rot over time; use only untreated (heat-treated, marked “HT”) pallets | Hot composting on a budget |
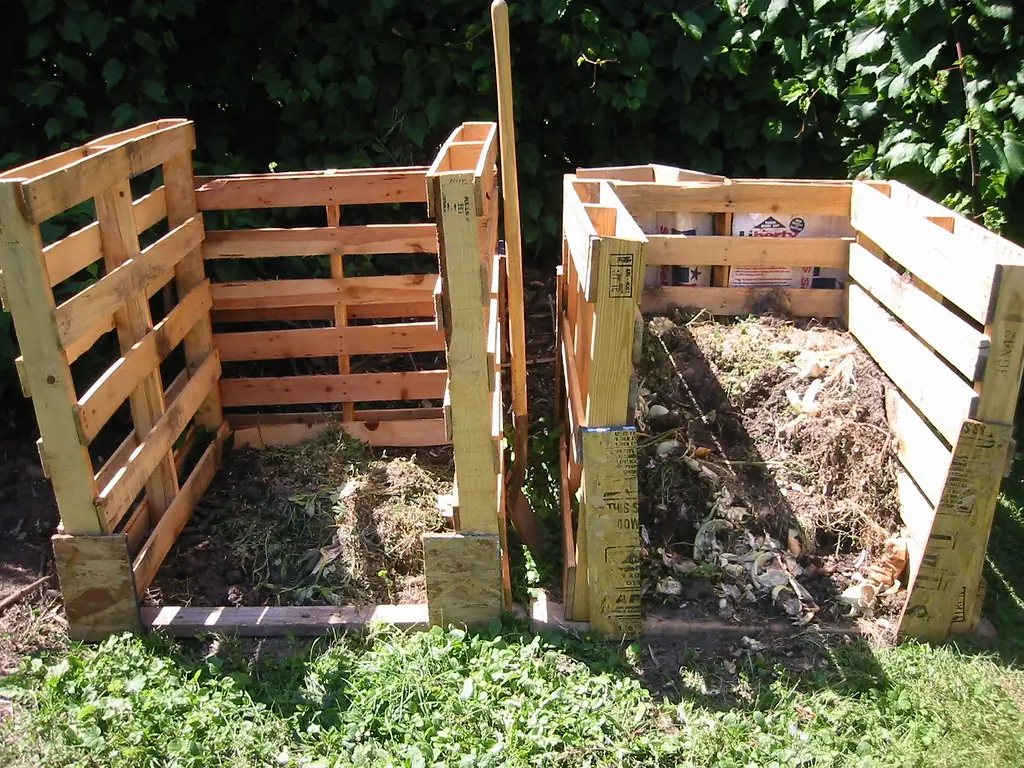
| Three-bay bin (wood or pallets) | Moderate | One bay filling, one working, one finishing; easy turning from bay to bay | Takes more space and building time | Steady supply of compost; homesteads |
| Tumbler | Moderate to high | Neat and tidy; easy aeration; keeps pests out | Usually too small to hold heat for hot composting; awkward to fill and empty | Small yards, kitchen scraps |
If you have the room, a three-bay bin is the most practical setup for a productive vegetable garden or a homestead on an acre. You always have one bay being filled, one breaking down, and one ready to use.
Pro tip: Build each bay of a three-bay bin at least 3 ft (90 cm) wide and deep, and make the front slats removable. Being able to slide boards out one at a time makes turning compost from one bay to the next far less work.
Hot vs Cold Composting
Both methods make good compost. The difference is how much work you put in and how fast you want it.
| Hot composting | Cold composting | |
|---|---|---|
| How it works | Build a full-size pile at once, keep it moist, turn it often | Add materials as you get them, turn rarely or never |
| Pile temperature | About 130–160°F (55–70°C) in the center | Close to air temperature, up to around 110°F (43°C) |
| Time to finished compost | Around 6–8 weeks of active composting, plus a few weeks of curing | About a year, sometimes longer |
| Labor | Higher: regular turning and checks | Low |
| Weed seeds and pathogens | Most killed if the pile stays above 130–140°F | Many survive, so keep weed seeds and diseased plants out |
| Best for | Large batches of garden waste, fast turnaround | Small, steady flow of kitchen and garden scraps |
NC State Extension notes that temperatures over 130°F kill most pathogens and over 140°F kill most weed seeds. That’s why hot composting is the better choice if your heap includes weedy material.
Maintaining Your Pile: Moisture, Turning and Temperature
Moisture
Squeeze a handful from inside the pile. It should feel like a wrung-out sponge: damp, with maybe a drop or two of water, but not dripping. NC State puts this at about 40–60% moisture. Water in dry weather, and add browns or cover the pile if it’s soggy.
Turning compost
Turning brings air into the pile and moves the cooler outer material into the hot center. For a hot pile, NC State suggests mixing once a week, moving material from the outside to the middle. The University of Maryland recommends turning before the center temperature drops below about 100°F (38°C). Cold piles only need turning once or twice a year, if at all.
Temperature
A hot pile should reach roughly 130–160°F (55–70°C) in the center. Use a compost thermometer, or push your hand into the middle: it should feel clearly hot. If it goes above about 160°F (70°C), turn it to cool it down, since very high heat can kill off the useful microbes too. As the pile finishes, the temperature drops and stays low even after turning.
What NOT to Compost
Warning: Keep these out of a home compost pile: meat, fish, bones, dairy, cooking oils and greasy foods (they smell and attract rats, raccoons and dogs); dog and cat waste (can carry parasites and diseases that infect people); diseased or pest-infested plants and weeds gone to seed or with persistent roots (home piles often don’t get hot enough to kill them); treated, painted or stained wood and sawdust (chemical residues); plants or grass treated with herbicides; glossy or coated paper, plastics and synthetic fabrics; charcoal barbecue ash and large amounts of wood ash. Check local rules before composting raw manure.
If you’re unsure about an item, leave it out.
Troubleshooting Common Compost Problems
| Symptom | Likely cause | Fix |
|---|---|---|
| Rotten egg smell | Too wet, not enough air | Turn the pile; mix in dry browns such as straw or shredded cardboard |
| Ammonia smell | Too many greens (too much nitrogen) | Add browns and mix well |
| Slimy, soggy, matted | Too much grass or rain; too few browns | Add browns, fork it open, cover against rain |
| Pile won’t heat up | Too small, too dry, or too few greens | Build to at least 3 × 3 × 3 ft; water to damp-sponge level; add greens |
| Hot in the middle only | Pile is working, edges are cool | Normal; turn to move the outer layer into the center |
| Flies or fruit flies | Exposed food scraps | Bury scraps in the center; cover with a layer of browns |
| Rats, raccoons or other animals | Meat, dairy or oily food; exposed scraps | Remove problem foods; bury scraps; use a closed bin or line the base with fine wire mesh |
When Compost Is Ready and How to Use It
According to NC State Extension, compost is basically done when:
- You can’t recognize the original materials.
- The pile stays less than about 10°F (5–6°C) warmer than the air, even after turning.
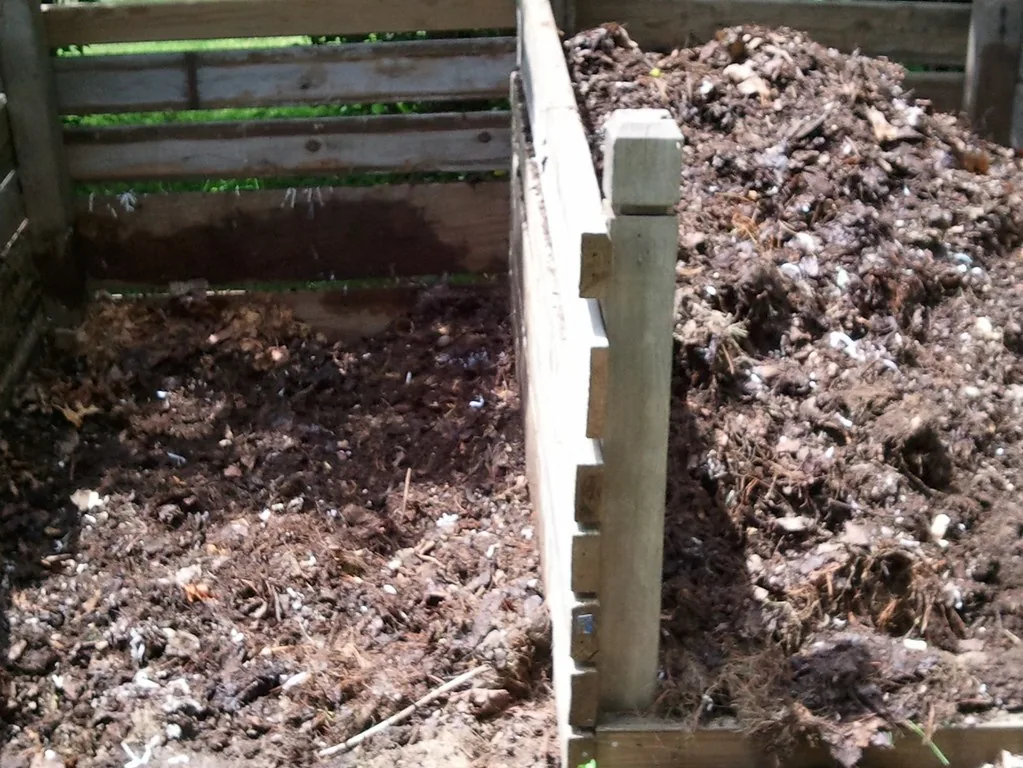
- It’s dark brown or black and crumbly.
- It smells earthy, not of ammonia or rotten eggs.
After the hot phase, let it cure for another four to eight weeks before using it around young plants. Sieve out any large bits and toss them back in the next pile.
How to use it:
- As a mulch or soil improver: the RHS suggests spreading a layer at least 2 in (5 cm) thick over the soil surface.
- Dig or fork into new beds before planting. It’s especially useful on heavy ground; see our guide to compost for clay soil.
- Enrich planting holes and trenches for hungry crops. It works well when growing potatoes.
- Top-dress beds in autumn after harvest, alongside winter cover crops to protect and feed the soil over winter.
Timing for Cold Climates and the Southern Hemisphere
Composting slows down a lot in cold weather. In cold-winter areas (roughly USDA zones 3–6, most of Canada, and colder parts of the UK), outdoor piles often go dormant once temperatures stay around freezing. They start working again in spring.
- Autumn is the best time to build a pile. Leaves are plentiful, and the garden is being cleared. It’s a natural fit with planting fall garden vegetables and cleaning out summer beds.
- Build big before winter. A larger pile holds heat longer. You can insulate the sides with straw bales or bagged leaves.
- Don’t turn in deep winter. The University of Maryland advises against turning piles during the winter months, because it lets heat escape.
- Keep adding scraps. Frozen kitchen scraps will just sit on top of the pile until spring. That’s fine, but cover them with browns.
- Warm climates (USDA zones 8 and up, much of Australia) can compost all year. The bigger problem is usually keeping the pile moist in summer.
Southern Hemisphere: seasons are shifted by about six months. In Australia, New Zealand and South Africa, autumn leaf collection and pile building happen around April to May, and spring start-up is around September to October.
Helpful gear for this guide
Handy picks that match the advice above.
Links go to Amazon. Prices and availability change, so check reviews and fit for your setup before buying.
Quick Reference: Compost Pile Basics
| Factor | Target |
|---|---|
| Minimum size for hot composting | 3 × 3 × 3 ft (27 cu ft, about 1 cu yd / 0.75 m³) |
| Maximum height | About 5 ft (1.5 m) |
| Browns to greens | About 2:1 by volume |
| Carbon to nitrogen ratio | About 30:1 |
| Moisture | 40–60%, like a wrung-out sponge |
| Hot pile temperature | 130–160°F (55–70°C) |
| Turning (hot pile) | About once a week |
| Time to finish | Hot: about 2–4 months including curing. Cold: about a year |
FAQ
How long does it take for a compost pile to turn into compost?
A well-managed hot pile can finish its active stage in about 6–8 weeks, then needs a few more weeks of curing. A cold pile that you add to over time and rarely turn usually takes about a year. The RHS gives a range of six months to two years for typical garden heaps.
Should a compost pile be in the sun or shade?
Either works. Partial shade stops the pile drying out in hot summers, while a sunnier spot can help it stay warmer in cool climates. Good drainage and easy access matter more than sun.
Do I need a compost bin, or can I just make a pile?
A free-standing heap works fine if you have space. A compost bin keeps things tidy, holds heat and moisture better at the edges, and can help keep animals out, which matters more in small or urban yards.
How often should I turn my compost?
For hot composting, about once a week, or whenever the center temperature starts to drop. For cold composting, once or twice a year is enough, or you can skip turning and just wait longer.
Can I put chicken manure in my compost?
Yes. Manure from chickens and other plant-eating animals is a strong green and helps a pile heat up. Balance it with plenty of browns, such as the straw or wood shavings from coop bedding. Never add dog or cat waste, and check local rules on composting raw manure.
Why does my compost smell bad?
A rotten-egg smell means the pile is too wet and short of air, so turn it and add dry browns. An ammonia smell means too many greens, so mix in more browns. A healthy pile smells earthy.
Sources
- Cornell Composting: Compost Chemistry (C/N ratios)
- NC State Extension Gardener Handbook: Composting
- University of Maryland Extension: How to Make Compost at Home
- Royal Horticultural Society: Composting
Local rules on composting manure and food waste vary. Your local extension office or council can advise on what’s allowed and what works best in your climate.

8 Comments