


Last updated: November 2026
Prune apple trees in late winter or early spring, while the tree is still dormant and after the coldest weather has passed, but before the buds open. Start by removing dead, damaged and diseased wood, then cut out suckers, water sprouts and crossing branches, and finish by thinning crowded limbs so light reaches the center of the tree. Remove no more than about 30% of the live wood in one year.
This step-by-step guide covers timing by region, the tools you need, the two basic cuts, how to train a young tree, how to prune a mature or neglected one, and the mistakes that cost you fruit.
Key takeaways
- When: late winter to early spring, before bud break (July–August in the Southern Hemisphere).
- Order: dead, damaged and diseased wood first, then suckers, water sprouts, crossing and inward-growing branches.
- Limit: take no more than about 30% of the tree per year; spread big renovations over several winters.
- Cut cleanly just outside the branch collar or back to a bud or side branch, and skip wound paint.
In this guide
When to Prune Apple Trees
The main pruning job happens during dormancy, in late winter or early spring. Waiting until the worst cold is over lowers the risk of winter injury around fresh cuts, and pruning before the leaves come out lets you see the tree’s structure clearly. University of Wisconsin horticulturists advise finishing dormant pruning before the leaves emerge.
| Region | Typical dormant pruning window |
|---|---|
| Cold climates (USDA zones 3–5, last frost late April to May) | March to early April |
| Moderate climates (zones 6–7) | Late February to March |
| Mild climates (zones 8–9) | January to February |
| UK and Ireland | Between leaf fall and bud burst, roughly November to early March, avoiding frozen spells |
| Southern Hemisphere (Australia, New Zealand, South Africa) | Late winter, around July to August |
A few jobs fall outside that window:
- Water sprouts and suckers: remove them in early summer while they’re soft. Leaving them until spring tends to bring back even more.
- Broken or diseased limbs: cut them out whenever you spot them.
- Trained forms such as espaliers and cordons are mostly shaped with summer pruning, once the current season’s shoots have matured.

Why Pruning Matters
An unpruned apple tree keeps growing upward and outward until the center is a dark tangle. That causes three problems: fruit in the shade stays small and poorly colored, still air in the canopy encourages fungal diseases like apple scab, and long, crowded limbs break under a heavy crop. Pruning fixes all three by opening the tree to light and air and keeping it at a height you can pick from.
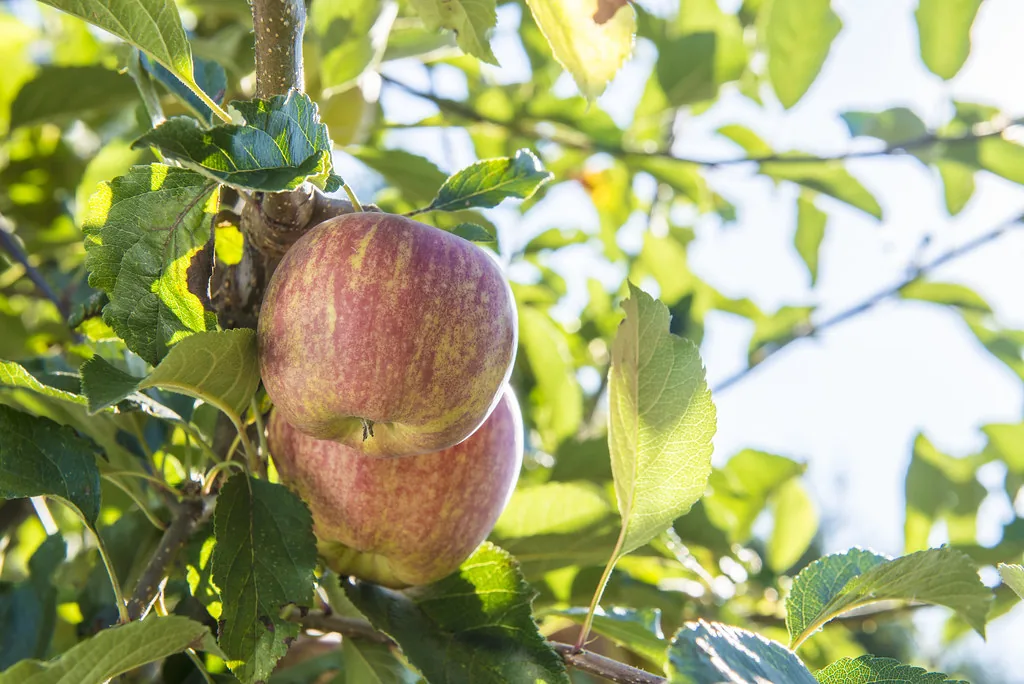
Most modern apple varieties bear fruit on spurs, short stubby shoots that form on wood two years old or older and keep fruiting for several years. A few varieties are tip bearers, carrying much of their fruit at the ends of last year’s shoots. Oregon State University Extension recommends finding out which type you have before you prune, because shortening every shoot on a tip bearer removes much of the crop.
Tools You’ll Need
- Bypass hand pruners for shoots up to about the thickness of a pencil or a little more. Bypass (scissor-type) blades crush less wood than anvil pruners.
- Loppers for branches up to about 1 in (2.5 cm) thick, or ones you can’t reach with hand pruners.
- A pruning saw for anything thicker. A folding pruning saw cuts on the pull stroke and fits in a pocket.
- A pole pruner if you have tall, older trees, so you can work from the ground instead of a ladder.
- Gloves, eye protection and a disinfectant such as rubbing alcohol for wiping blades between trees, and between cuts when removing diseased wood.
The Two Basic Pruning Cuts
Thinning cuts
A thinning cut removes a whole shoot or branch back to where it starts, either at the trunk or at a larger branch. This is the cut you’ll use most. It opens the canopy without triggering a flush of new shoots. Cut just outside the branch collar, the slightly swollen ring of bark at the base of the branch, and don’t leave a stub.
Heading cuts
A heading cut shortens a shoot partway along its length, just above a bud. It encourages several new shoots to grow below the cut, which is useful for shaping a young tree but leads to dense, bushy growth if overused on a mature one. Always cut back to a bud, a shoot or a side branch, never to a bare stretch of stem.
Removing a large limb
Use three cuts so the weight of the branch doesn’t tear the bark down the trunk:
- About 12 in (30 cm) out from the trunk, cut partway up from the underside.
- A little farther out, cut down from the top until the limb drops.
- Remove the remaining stub with a final cut just outside the branch collar.
Pro tip: skip the wound paint. Extension specialists advise leaving cuts untreated; a clean cut at the collar seals on its own.
How to Prune a Young Apple Tree
For the first four or five years, the goal is a strong framework, not fruit. Most home apple trees are trained to a central leader: one upright trunk with tiers of side branches (scaffolds), giving the tree a cone or Christmas-tree shape that lets light reach every level.
- At planting: if you bought an unbranched whip, cut it back to about 36 in (90 cm) just above a bud to encourage side branches.
- Year 2: choose 2–3 well-spaced scaffold branches pointing in different directions, with the lowest about 20–24 in (50–60 cm) above the ground. Remove competing shoots.
- Year 3 and after: add another tier of scaffolds higher up, leaving roughly 6–12 in (15–30 cm) of trunk between branches.
- Train the angles: aim for branches at about 60 degrees from the trunk. Narrow, upright crotches are weak and can split; wedge in a notched stick or a clothespin as a spreader on young shoots, and remove spreaders at the end of the growing season.
- Prune lightly. Heavy pruning delays the first crop and pushes leafy growth.
Rootstock matters too. Most apple trees are grafted onto a rootstock that controls their final size (see our guide on how to propagate plants), and dwarf and semi-dwarf apples are far easier to keep at picking height. If you’re still choosing trees, see our guide to fast-growing fruit trees.
Watch: How to Prune an Apple Tree
This short video from Utah State University Extension demonstrates the basics on a real tree.
How to Prune a Mature Apple Tree
Once your tree is bearing, prune every winter in this order. Step back and look at the whole tree often.
- Dead, damaged and diseased wood. Remove it first; it doesn’t count toward your 30% limit. For fire blight cankers, cut well into healthy wood (extension guides typically suggest 8–12 in / 20–30 cm below the visible damage) and disinfect your tools after each cut.
- Suckers growing from the rootstock at the base of the trunk.
- Water sprouts, the vigorous vertical shoots on top of branches. They rarely fruit and they shade the center.
- Crossing and rubbing branches. Keep the one that best fits the framework.
- Branches growing into the center or hanging straight down beneath others.
- Height. To lower the tree, cut the leader back to a strong side branch, which then becomes the new top.
- Renew fruiting wood. Branches tend to fruit best for a few years after they start bearing. Remove some of the oldest, least productive ones so younger wood can replace them, and thin crowded spur clusters.
Then stop. Once you’ve removed about 30% of the live wood, leave the rest for next winter. If you want a broader overview for pears, plums and cherries as well, read our complete guide to pruning fruit trees, and for figs, which are pruned quite differently, see fig tree care.
Pruning an Old or Neglected Tree
An overgrown tree needs patience. Cutting it back hard in one winter triggers a forest of water sprouts and little fruit.
- Year 1: remove dead and diseased wood, then take out a few of the largest problem limbs to open up the center.
- Year 2: decide on the framework you want to keep and remove a few more large branches, plus the water sprouts that appeared.
- Year 3 and beyond: fine-tune with smaller thinning cuts and start renewing fruiting wood.
Safety first: never prune near power lines yourself, hire a certified arborist for big limbs near buildings, and use a proper three-legged orchard ladder or a pole pruner rather than leaning a ladder against the branches you’re cutting.
Common Pruning Mistakes
- Pruning too hard. Over-pruning delays fruiting and produces masses of leafy shoots.
- Heading every shoot. Shortening all the branch tips makes a dense, broom-like canopy and can remove the crop on tip-bearing varieties.
- Leaving stubs or cutting flush into the trunk instead of just outside the branch collar.
- Keeping narrow crotches that later split under a crop.
- Ignoring water sprouts until the center is solid shade.
- Pruning in fall. Cuts made in autumn can be more prone to winter injury; wait until late winter.
Helpful gear for this guide
Handy picks that match the advice above.
Links go to Amazon. Prices and availability change, so check reviews and fit for your setup before buying.
At a Glance
Print or pin this chart for pruning day:

FAQ
What month is best to prune apple trees?
Late winter to early spring, before buds open. That’s usually February to March in much of the US, March to early April in cold northern areas, and July to August in the Southern Hemisphere.
Can you prune apple trees in summer?
Yes, lightly. Summer is the right time to remove water sprouts and suckers and to shape trained forms like espaliers. Save major structural cuts for the dormant season.
How much can you cut off an apple tree?
No more than about 30% of the live wood in one year. Dead wood doesn’t count. Spread bigger changes over two or three winters.
Should you cut the top off an apple tree?
Don’t simply chop it off. To lower a tree, cut the leader back to a strong side branch so that branch becomes the new top. Topping leaves stubs that sprout dense, weak growth.
Do you need to seal pruning cuts?
No. Extension specialists recommend leaving cuts untreated. Make clean cuts just outside the branch collar and the tree will seal them itself.
Sources
- Kansas State University Research and Extension: Pruning Apple and Pear Trees (MF3450)
- University of Minnesota Extension: Pruning and Training Apple Trees
- Oregon State University Extension: Prune Apple Trees in Late Winter
- University of Wisconsin–Madison Extension: Apple Pruning Season Upon Us
This guide contains affiliate links. As an Amazon Associate, FarmingAround earns from qualifying purchases, at no extra cost to you.
Get free farming guides in your inbox
Practical guides, seasonal tips and market updates. No spam, unsubscribe anytime.
Subscribe free


One Comment