

Last updated: September 2026
This guide contains affiliate links. As an Amazon Associate, FarmingAround earns from qualifying purchases, at no extra cost to you.
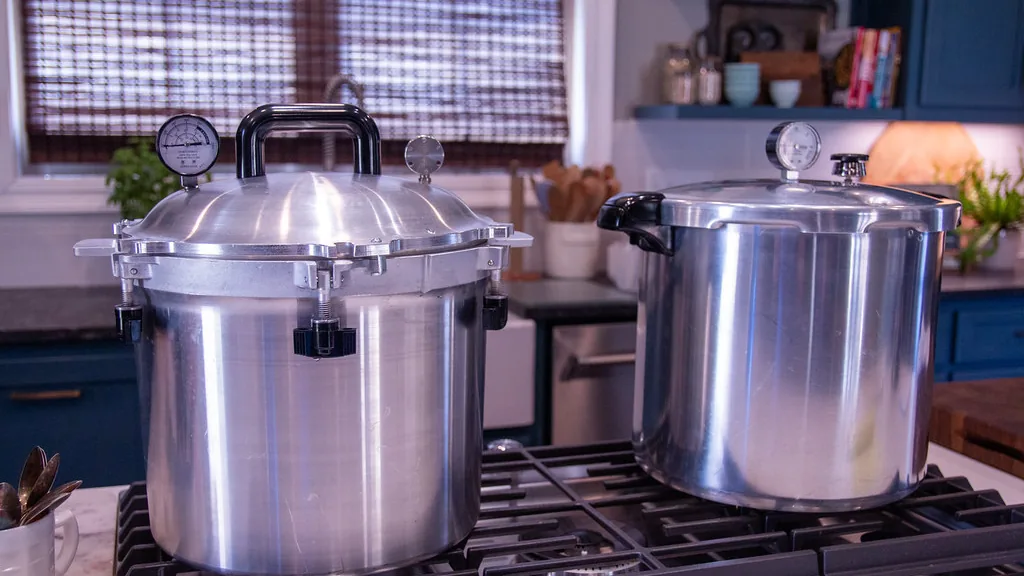
Pressure canning for beginners comes down to one rule: low-acid foods like vegetables, meat, poultry and stock must be processed in a pressure canner, because only a pressure canner reaches the 240–250°F (116–121°C) needed to destroy Clostridium botulinum spores. A boiling-water canner tops out around 212°F (100°C), which is not hot enough for these foods.
The process is very learnable. This guide walks through each step, and every time and pressure in it comes from the USDA Complete Guide to Home Canning as published by the National Center for Home Food Preservation (NCHFP).
Key takeaways
- Low-acid foods need pressure: vegetables, meats, poultry, seafood and stock must be pressure canned to control botulism.
- Use a real pressure canner: it should hold at least 4 quart jars; electric multicookers such as the Instant Pot are not recommended for canning.
- Vent, then pressurize: let steam flow for 10 full minutes before adding the weight, and adjust pressure for your altitude.
- Tested recipes only: don’t change ingredients, thicken, puree pumpkin, or guess at times.
In this guide
- Why low-acid foods need pressure canning
- Pressure canning vs water bath: which foods go where
- Equipment you need
- How to pressure can, step by step
- Altitude adjustments
- Example processing times
- Storage and shelf life
- Botulism safety rules
- Common beginner mistakes
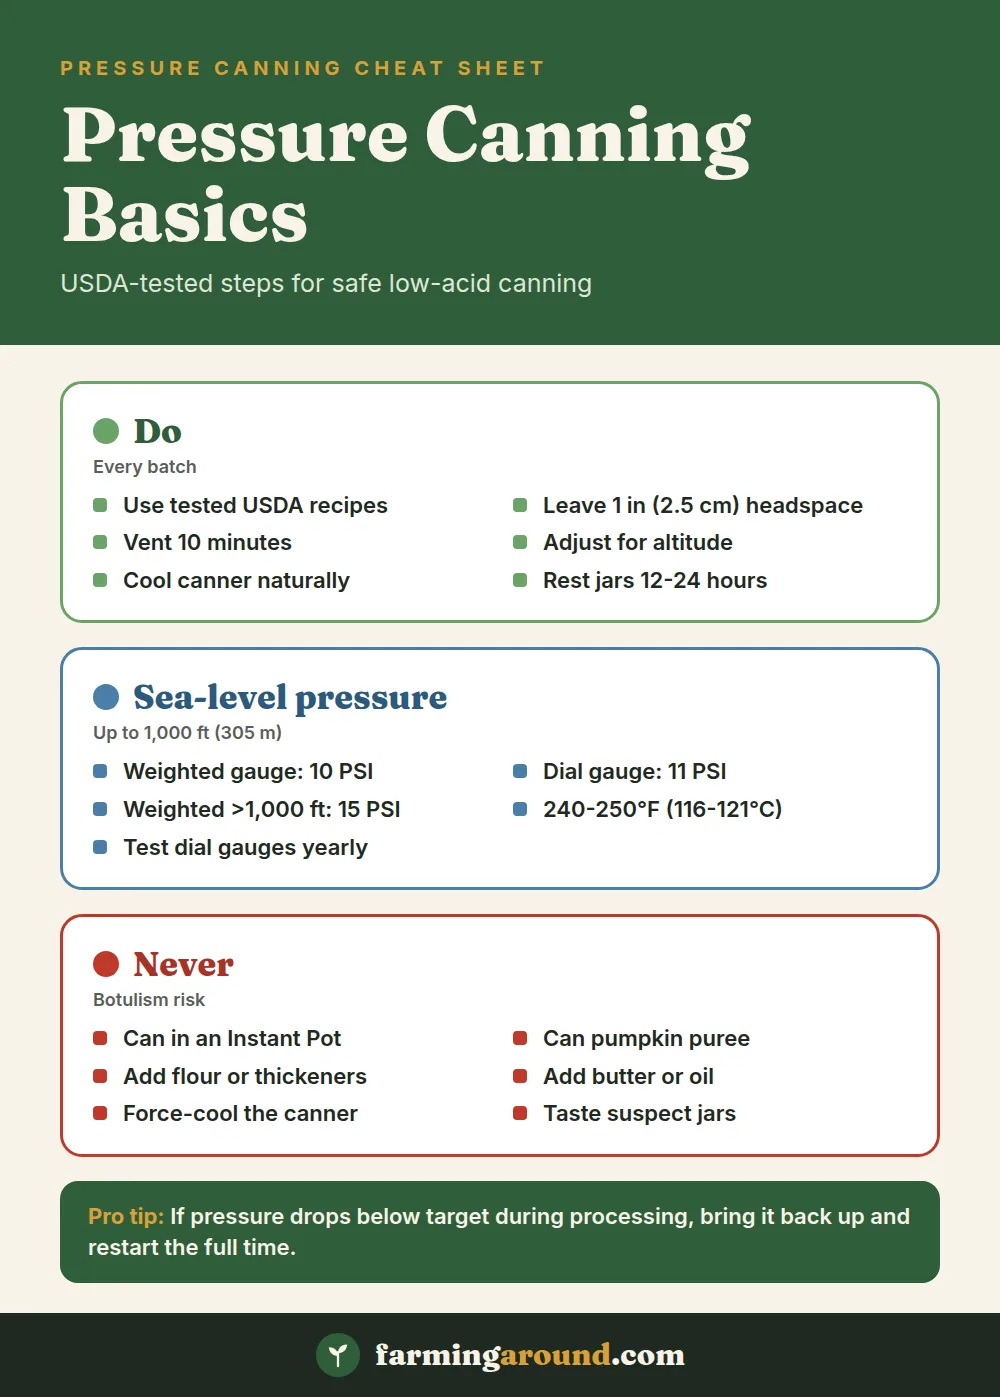
- Quick Reference: pressure canning basics
- FAQ
- Sources
Why low-acid foods need pressure canning
Botulinum spores are on most fresh food surfaces. They are harmless on fresh food, but inside a sealed jar of moist, low-acid food they can grow and produce a deadly toxin. According to NCHFP, those spores are very hard to destroy at boiling-water temperatures, so all low-acid foods should be sterilized at 240–250°F (116–121°C). You reach those temperatures in a pressure canner running at 10 to 15 pounds per square inch (PSI).
Low-acid foods have a pH above 4.6. That group includes red meat, seafood, poultry, milk and all fresh vegetables except most tomatoes. Acid foods (pH 4.6 or lower), such as most fruits, pickles, jams and properly acidified tomatoes, can go in a boiling-water canner.
Pressure canning vs water bath: which foods go where
| Food | Acidity | Method |
|---|---|---|
| Green beans, carrots, corn, beets, peas | Low-acid | Pressure canner |
| White and sweet potatoes, pumpkin and winter squash (cubed only) | Low-acid | Pressure canner |
| Meat, poultry, fish and seafood | Low-acid | Pressure canner |
| Meat, chicken and turkey stock; vegetable soups | Low-acid | Pressure canner |
| Dried beans (soaked and cooked per recipe) | Low-acid | Pressure canner |
| Fruits, jams, jellies, fruit butters | Acid | Boiling-water canner |
| Pickles and sauerkraut | Acid | Boiling-water canner |
| Tomatoes with added lemon juice or citric acid | Acidified | Boiling water or pressure, per the tested recipe |
If you grow your own staples, pressure canning is how you put up the harvest from a potato patch or a sweet potato bed without relying on the freezer.
Equipment you need
Pressure canner vs pressure cooker
USDA says a canner must be large enough to hold at least 4 quart jars standing upright to be used with its published processes. Small stovetop pressure saucepans are not recommended for canning. NCHFP also states that its canning processes are not recommended for electric pressure multicookers (Instant Pot-style appliances).
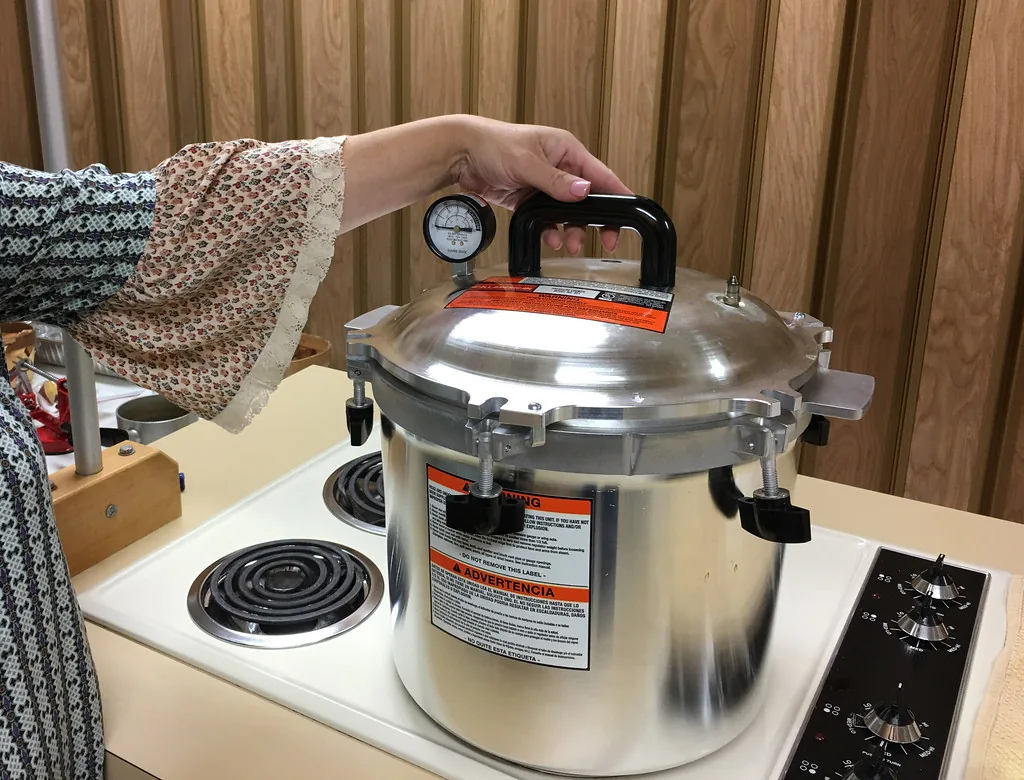
Modern canners have a removable rack, a vent pipe, a safety fuse and a cover lock. Buy one with Underwriters Laboratories (UL) approval.
Weighted gauge vs dial gauge
- Weighted gauge: a weight sits on the vent pipe and jiggles or rocks to show and regulate pressure. It works in 5, 10 and 15 PSI steps and doesn’t need testing.
- Dial gauge: shows the exact pressure on a dial. It lets you run at 11, 12, 13 or 14 PSI, but it must be checked for accuracy every year. If it reads off by more than 2 PSI at 5, 10 or 15 pounds, replace it. Many local extension offices test gauges.
You’ll also need canning jars, new lids with bands, a jar lifter, a funnel and a headspace tool.
How to pressure can, step by step
These steps follow NCHFP’s “Using Pressure Canners” instructions.
- Prep canner, jars and food. Check that the gasket is clean and the vent pipe is clear. Wash the jars and keep them hot, then prepare the food exactly as the tested recipe says.
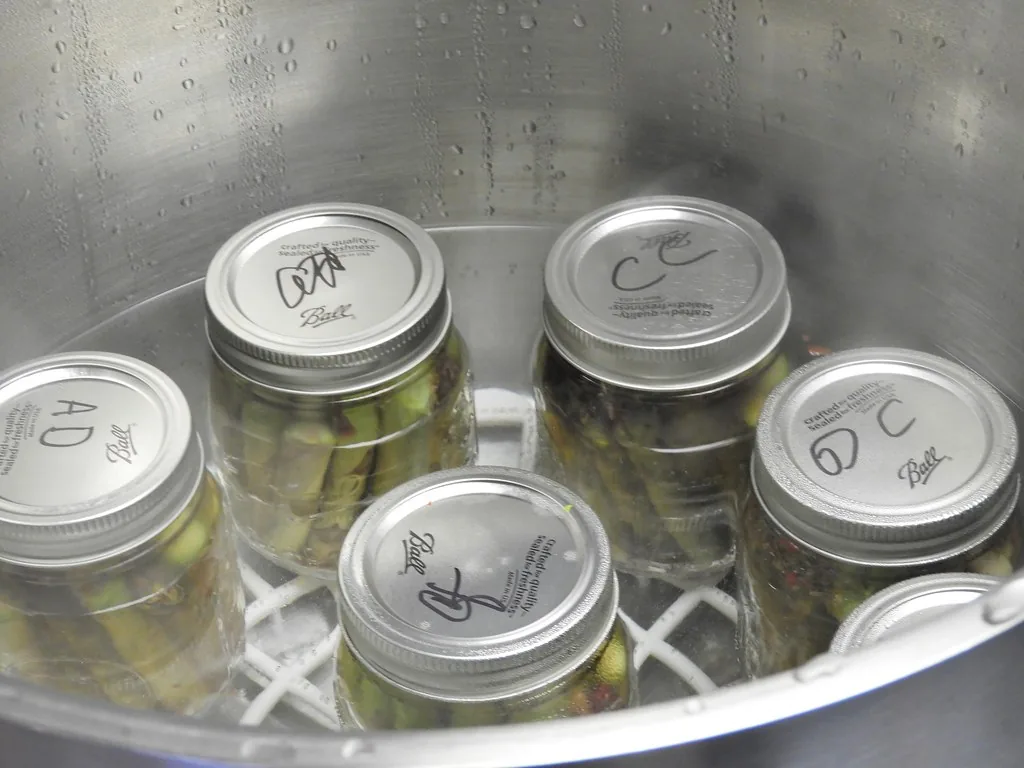
- Add water. Put the rack in and add 2–3 inches (5–7.5 cm) of water, unless your recipe or canner manual calls for more. Heat it to 180°F (82°C) for hot-packed food or 140°F (60°C) for raw-packed food.
- Fill jars and leave headspace. Most vegetables and stock need 1 inch (2.5 cm) of headspace. Chicken needs 1¼ inches (about 3 cm). Remove air bubbles and wipe the rims clean.
- Add lids. Put on lids and bands, then set the jars on the rack with a jar lifter. Keep them upright.
- Vent for 10 minutes. Lock the lid with the weight off (or the petcock open). Heat on high until steam flows in a steady funnel, then let it vent for 10 full minutes. Venting pushes out trapped air, which would otherwise lower the temperature inside.
- Pressurize. Put the weight on, or close the petcock. The canner will come up to pressure in 3–10 minutes.
- Time the process. Start timing when the dial reaches the target pressure or the weight begins to jiggle as your manual describes. If pressure drops below the target at any point, bring it back up and restart the full time from zero.
- Cool naturally. Turn off the heat and let the canner depressurize on its own. Never run water over it or open the vent early.
- Open carefully. Once pressure is at zero and the lock has dropped, remove the weight, wait 10 minutes, then lift the lid away from your face.
- Remove jars and let them rest. Lift the jars straight out and set them on a towel, 1 inch (2.5 cm) apart and out of drafts. Leave them alone for 12–24 hours without tightening the bands.
- Check the seals. Take off the bands. A sealed lid is curved down in the middle, doesn’t flex when pressed, and rings when tapped with a spoon.
Pro tip: Before your first real batch, do a practice run with only water in the canner. You’ll learn how your stove holds pressure and what the weight sounds like without risking a load of food.
Watch: how to use a pressure canner
This video from SDSU Extension covers how to use a pressure canner.
Altitude adjustments
Water boils at a lower temperature as elevation rises, so you need more pressure to reach the same temperature. The values below apply to the vegetable, meat and stock processes in this guide. Always check your specific recipe’s table.
| Elevation | Dial gauge | Weighted gauge |
|---|---|---|
| 0–1,000 ft (0–305 m) | 11 PSI (76 kPa) | 10 PSI (69 kPa) |
| 1,001–2,000 ft (305–610 m) | 11 PSI (76 kPa) | 15 PSI (103 kPa) |
| 2,001–4,000 ft (610–1,219 m) | 12 PSI (83 kPa) | 15 PSI (103 kPa) |
| 4,001–6,000 ft (1,219–1,829 m) | 13 PSI (90 kPa) | 15 PSI (103 kPa) |
| 6,001–8,000 ft (1,829–2,438 m) | 14 PSI (97 kPa) | 15 PSI (103 kPa) |
A weighted gauge only has 5, 10 and 15 PSI settings, so above 1,000 feet you jump straight to 15 PSI.
Example processing times
These times come from the NCHFP recipe pages and apply only to each food’s tested preparation. The pressures shown are for low elevations; above that, use the altitude table. Half-pints use the pint time.
| Food (tested prep) | Headspace | Pints | Quarts | Pressure (weighted / dial) |
|---|---|---|---|---|
| Green beans, snap or Italian, pieces | 1 in (2.5 cm) | 20 min | 25 min | 10 / 11 PSI |
| Carrots, sliced or diced | 1 in (2.5 cm) | 25 min | 30 min | 10 / 11 PSI |
| Corn, whole kernel | 1 in (2.5 cm) | 55 min | 85 min | 10 / 11 PSI |
| White potatoes, cubed or whole (hot pack) | 1 in (2.5 cm) | 35 min | 40 min | 10 / 11 PSI |
| Pumpkin or winter squash, cubed (hot pack) | 1 in (2.5 cm) | 55 min | 90 min | 10 / 11 PSI |
| Meat strips, cubes or chunks | 1 in (2.5 cm) | 75 min | 90 min | 10 / 11 PSI |
| Meat, chicken or turkey stock (hot pack) | 1 in (2.5 cm) | 20 min | 25 min | 10 / 11 PSI |
Pumpkin must be canned in cubes, never mashed or pureed, because no safe home process exists for puree. If you’re growing for the pantry, see when to harvest pumpkins so they’re fully mature before you cube and can them.
Storage and shelf life
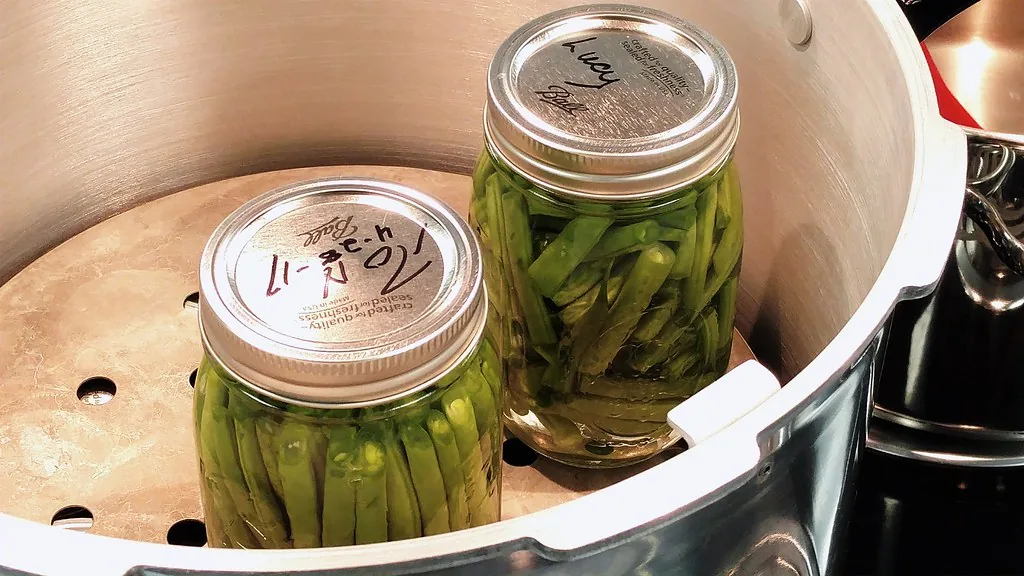
Wash sealed jars, label and date them, and store them without bands in a clean, cool, dark, dry place. NCHFP recommends 50–70°F (10–21°C) for best quality. Never store jars above 95°F (35°C), near a furnace or stove, or in direct sun. For best quality, can only what you’ll use within a year.
If a jar didn’t seal, refrigerate it and eat it within a week.
Botulism safety rules
Warning: Never taste food from an unsealed jar or one that looks spoiled. Warning signs include bulging or loose lids, leaks or streaks down the jar, rising bubbles, spurting liquid when you open it, odd colors, bad smells or mold. Spoiled low-acid food can show very little evidence, so treat any suspect jar as if it contains botulinum toxin. Bag sealed jars and put them in the trash. Detoxify open or leaking jars following NCHFP’s instructions, wearing gloves. Toxin can be fatal even in a taste, so seek medical care right away if you suspect botulism.
The other half of safety is the recipe itself. Use only current USDA or NCHFP-tested recipes, and don’t invent your own. In practice, that means:
- Don’t add flour, cornstarch, pasta, rice, cream or milk to soups before canning. Thicken when you serve.
- Don’t add butter, oil or extra fat. Tested recipes trim meat and skim stock.
- Don’t can mashed or pureed pumpkin or squash. Can cubes only.
- Don’t change jar sizes, pack more densely, or skip the covering liquid (“dry canning”).
Common beginner mistakes
- Skipping or shortening the vent. Trapped air lowers the temperature and leads to underprocessing.
- Ignoring altitude. Above 1,000 feet (305 m) with a weighted gauge, you need 15 PSI.
- Using an untested dial gauge. Have it checked every year.
- Forcing the cool-down. Cold water or opening the vent early causes spoilage, liquid loss and failed seals.
- Letting pressure dip without restarting the timer. Any drop below target means you start the full time again.
- Canning more than you’ll eat. Plan batches around your fall garden vegetables and a year of use.
Pressure canning pairs well with a productive small plot. Our guide to homesteading on an acre shows how to plan for a year-round pantry.
Helpful gear for this guide
Handy picks that match the advice above.
Links go to Amazon. Prices and availability change, so check reviews and fit for your setup before buying.
Quick Reference: pressure canning basics
FAQ
Can I pressure can in an Instant Pot?
No. NCHFP says its canning processes are not recommended for electric pressure multicookers. Use a stovetop pressure canner that holds at least 4 quart jars.
Is a weighted gauge or dial gauge better for beginners?
Both are safe when used correctly. A weighted gauge needs no annual testing and is easy to read by sound. A dial gauge allows finer pressure steps at altitude but must be tested every year.
Why do I have to vent the canner for 10 minutes?
Air trapped inside the canner lowers the temperature reached at a given pressure. That can leave food underprocessed even when the gauge reads correctly.
Can I can pumpkin puree?
No. USDA and NCHFP give a tested process for pumpkin and winter squash in cubes only. Can the cubes and mash them when you use them.
How long does home canned food last?
For best quality, eat it within a year and store it at 50–70°F (10–21°C). Check every jar’s seal and look for spoilage before you use it.
Sources
- National Center for Home Food Preservation: Using Pressure Canners
- National Center for Home Food Preservation: Ensuring Safe Canned Foods
- National Center for Home Food Preservation: Canning in Electric Multi-Cookers
- National Center for Home Food Preservation: Identifying and Handling Spoiled Canned Food
Always use current tested recipes from the National Center for Home Food Preservation (nchfp.uga.edu) or your local extension office, which can also test dial gauges and answer canning questions.

One Comment